Audio
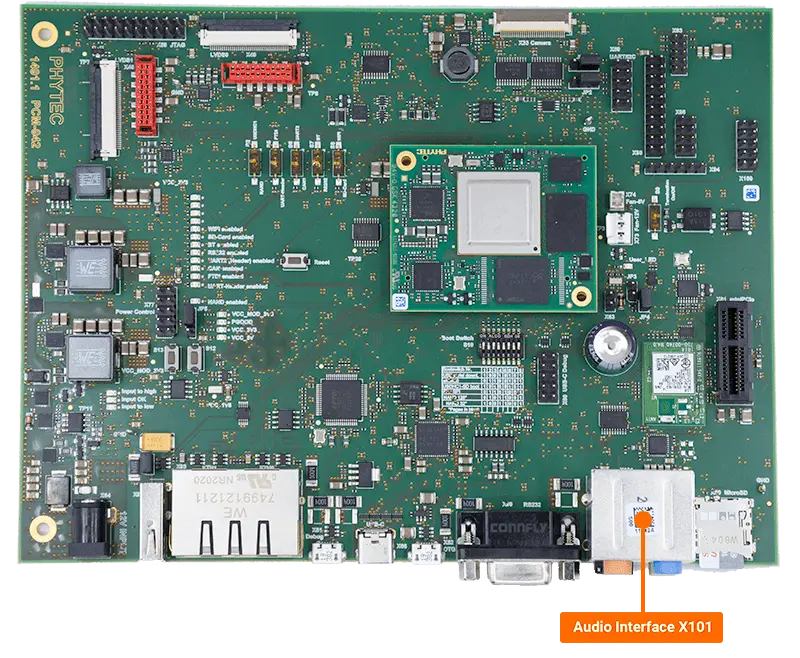
This guide will show you how to connect and use a headset/microphone in order to exercise some of the available audio interfaces supported on the development kit.


Requirements
Ethernet Cable (Included in development kit)
Headphone/Microphone device with a standard 2.5mm Audio Jack connection (individual or combo)
Playing Audio
For this example, you’ll need the phyCORE-i.MX8X development kit connected to the internet. Checkout the Ethernet guide first!
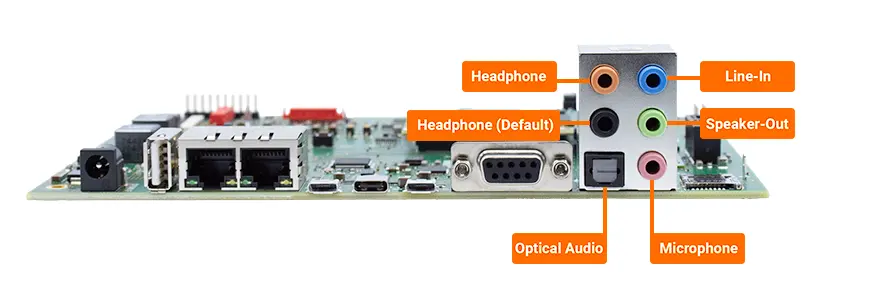
Next, plug your headphones into the “Headphone (Default)” port (the black headphone jack).
Use the “wget” command to download a sample .wav file from the music science web server at the University of Helsinki directly to the development kit.
Target (Linux)wget http://www.music.helsinki.fi/tmt/opetus/uusmedia/esim/a2002011001-e02.wav
Expected Outputa2002011001-e02.wav 100% |********************************| 9356k 0:00:00 ETA 'a2002011001-e02.wav' saved
Use the “aplay” command to play the audio
Target (Linux)aplay a2002011001-e02.wav
Expected OutputPlaying WAVE 'a2002011001-e02.wav' : Signed 16 bit Little Endian, Rate 44100 Hz, Stereo
Capturing Sound
Connect the microphone into the Pink jack.
Use the “arecord” command to capture audio at this interface. The command below will record sound for 10 seconds and save it to the file testrecord.wav.
Target (Linux)arecord -d 10 -f cd -t wav testrecord.wav
Expected OutputRecording WAVE 'testrecord.wav' : Signed 16 bit Little Endian, Rate 44100 Hz, Stereo
Use the following to playback the file you just recorded:
Target (Linux)aplay testrecord.wav
Expected OutputPlaying WAVE 'testrecord.wav' : Signed 16 bit Little Endian, Rate 44100 Hz, Stereo
Adjusting Playback and Capture Settings
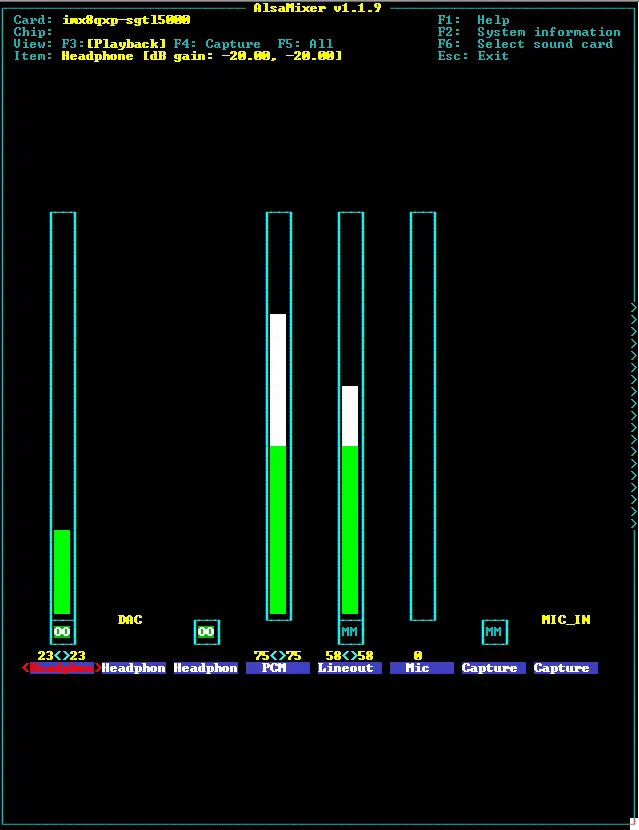
The alsamixer program can be used to configure sound devices and do things such as change volume or mute particular interfaces.
Tip
More information about alsamixer can be found here: https://linux.die.net/man/1/alsamixer
Launch alsamixer in the target console:
Target (Linux)alsamixer
A GUI interface will pop up which can be navigated using arrow keys and the hotkeys.
