Ethernet
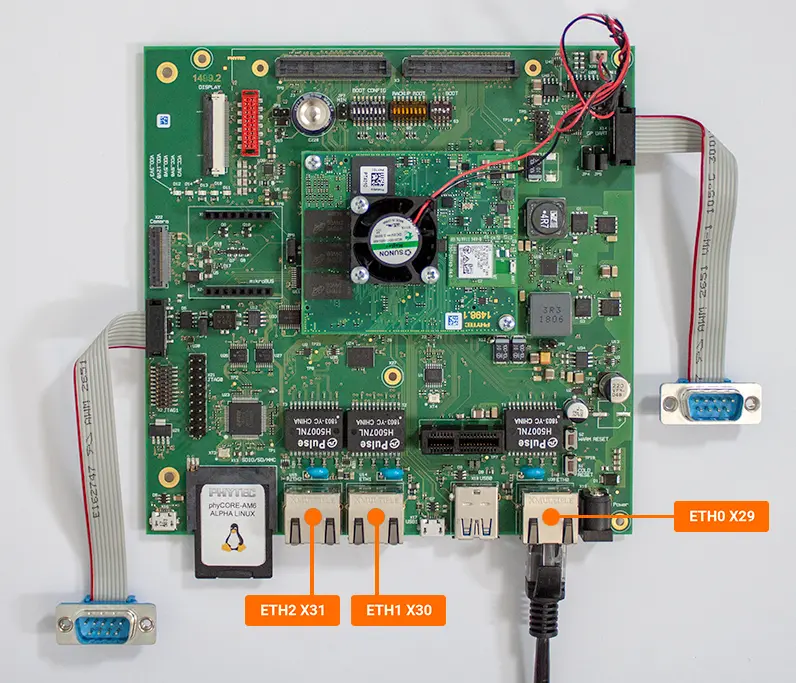
Three gigabit Ethernet links are provided via ETH0 (RJ45 at X29), ETH1 (RJ45 at X30), and ETH2 (RJ45 at X31) on the phyCORE-AM65x development kit. This guide shows you how to connect and use these interfaces manually.
Requirements
CAT5e Ethernet cable (included with your development kit)
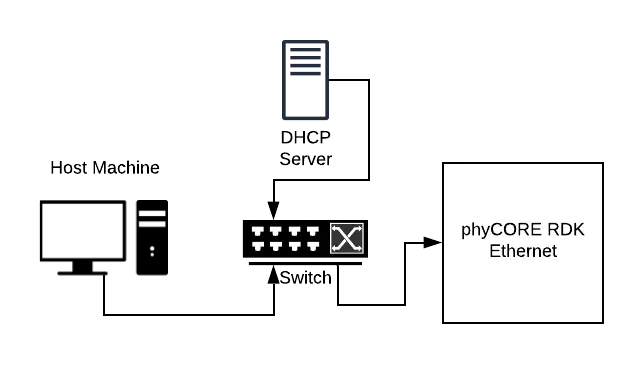
Ethernet switch connected to a network with DHCP enabled
Hardware Setup
Note
If a valid connection between the AM6 and your network is made before boot-up then the AM6 will automatically secure a connection and assign you an ip address.
If a valid connection between the AM65x and your network is made before boot-up then the AM65x will automatically secure a connection and assign you an ip address.
Note
Make sure the network you have connected to has DHCP enabled.
Connecting to Network
On the phyCORE-AM65x Linux console, enter the following command to bring up the Ethernet interface. (Replace ETH0 with ETH1 or ETH2 if you are connecting to one of the other Ethernet interfaces)
Target (Linux)ifconfig eth0 up && udhcpc -i eth0
Wait until the link is ready and an IP address has been assigned.
Verifying Connection
Test your connection by entering the following and verify that you are able to send and receive packets over your network connection:
Target (Linux)ping google.com
Expected Outputroot@am65xx-phycore-kit:~# ping google.com PING www.google.com (172.217.3.164): 56 data bytes 64 bytes from 172.217.3.164: seq=0 ttl=53 time=12.979 ms 64 bytes from 172.217.3.164: seq=1 ttl=53 time=17.327 ms 64 bytes from 172.217.3.164: seq=2 ttl=53 time=13.238 ms 64 bytes from 172.217.3.164: seq=3 ttl=53 time=14.636 ms
To stop the pinging test, enter Ctrl + C on the command prompt.