UART
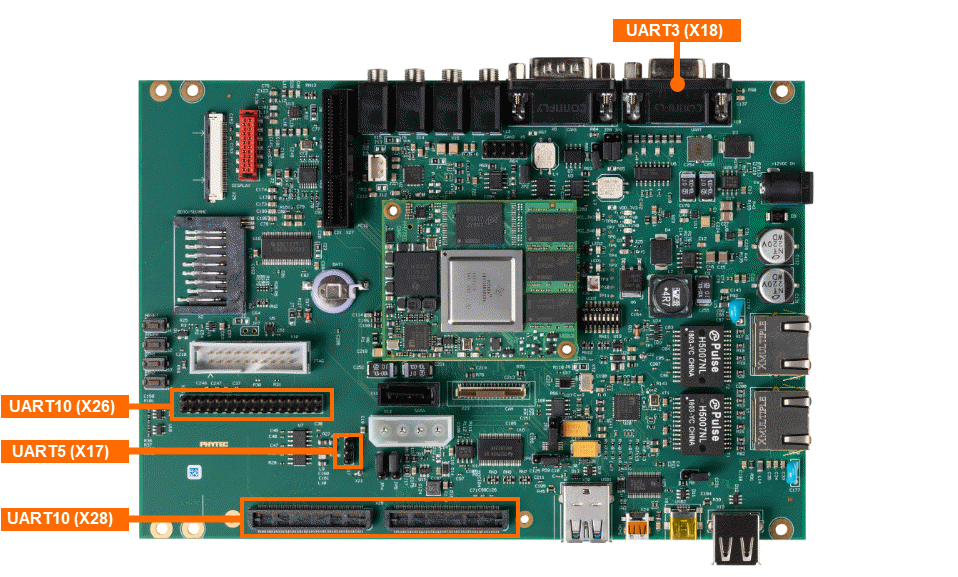
The phyCORE-AM57x SoC has the capibility of supporting eight UART interfaces. The phyBOARD-AM57x delopment kit prodives access to three of these signals through interface connectors. By default, the phyCORE-AM57x development kit is configured to use UART3 (ttyS2 in the device tree) for a Linux console input and output. The UART3 signal is available through a RS232-USB connector (X18). PHYTEC recommends allocating UART3 for console access on custom designs. This guide will show you how to send serial data over the UART5 interface.
UART |
Connector |
Character Device File |
|---|---|---|
UART3 Default Linux Console |
X18 (RS232-USB) |
/dev/ttyS2 |
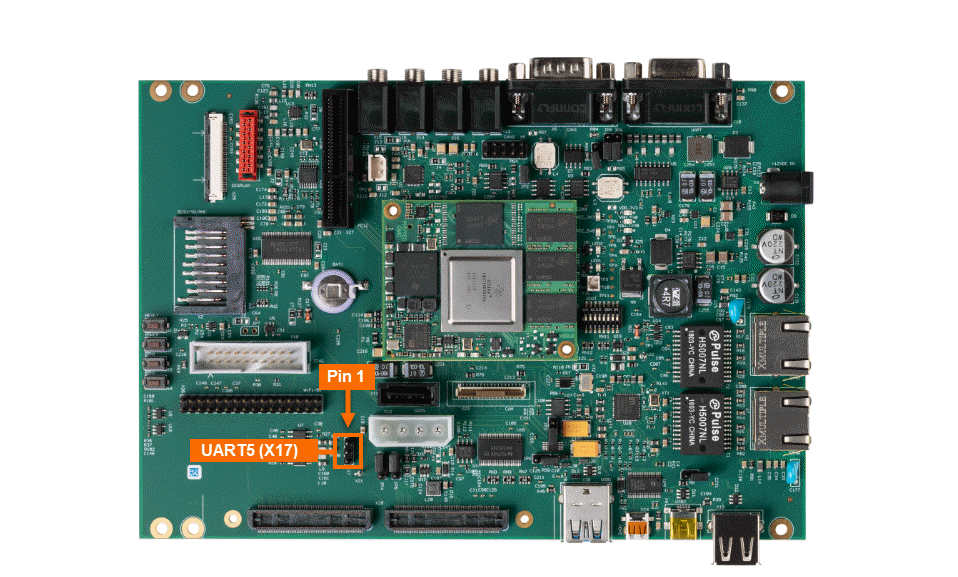
UART5 |
x17 (3-pin header) |
/dev/ttyS4 |
UAR10 |
X26 (Wifi header) X28 (Expansion Header) |
/dev/ttyS |
Requirements
Hardware Setup
Power off and remove the power supply from the development kit.
Target (Linux)poweroff
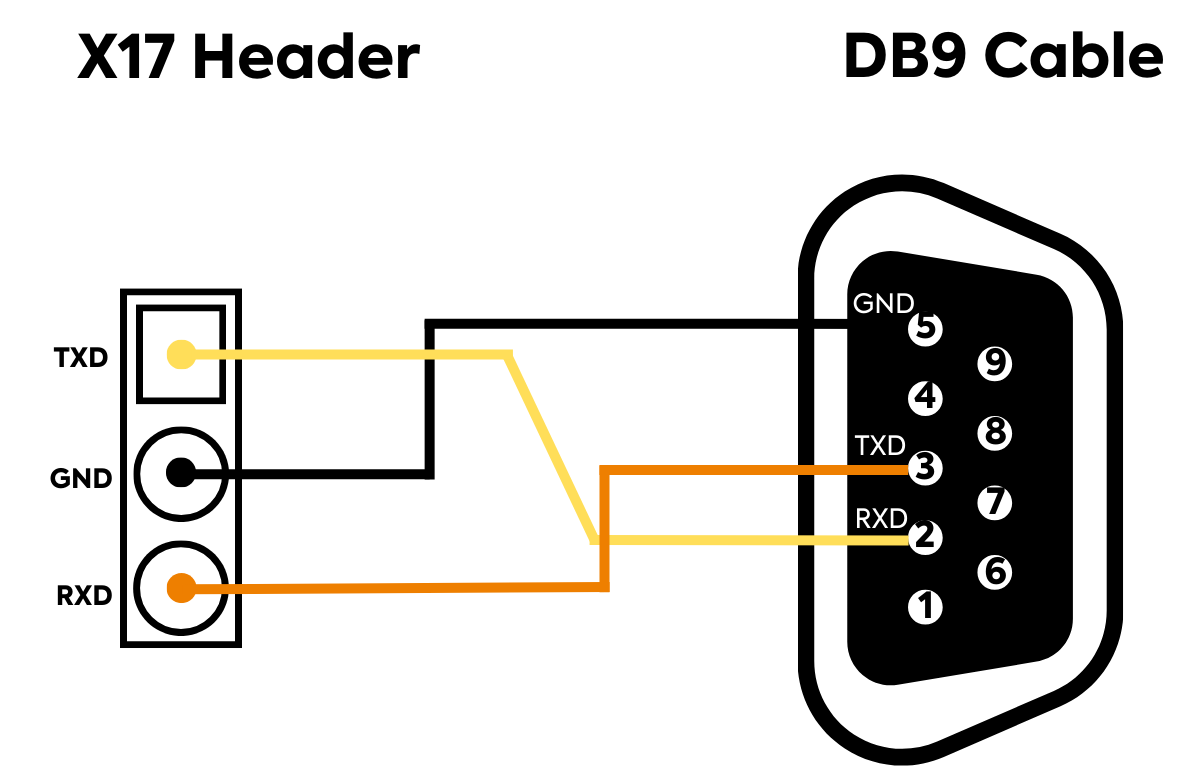
Connect the the RS232-USB to one side of the F/F jumper cables.
Then connect the F/F jumpers to the 3-pin header X17.
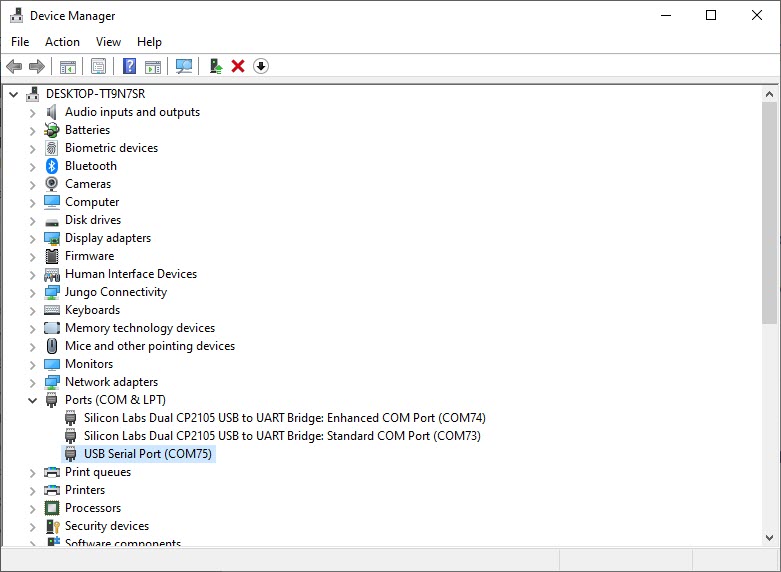
Open your Host system’s Device Manager and expand Ports (COM & LPT).
Note
Windows systems can press the Windows key, type “device manager” and press ENTER.
Connect the USB end of the RS232-USB cable to your Host machine.
Take note of any new device names that appear under “Ports”. You’ll need the COM port device number in the next steps.
UART5 Terminal Setup
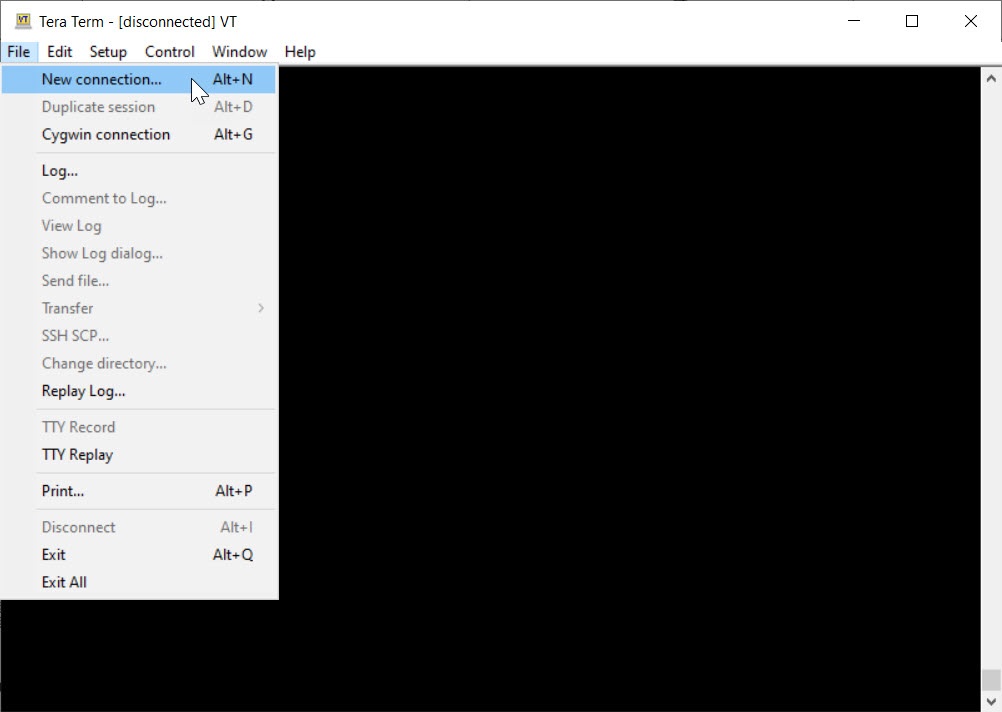
Open a new terminal window. This guide will be using TeraTerm but other emulators like PuTTY will work as well.
Set the serial parameters: 115200 Baud, 8 bit data, no parity bits, 1 stop bit and no flow control.
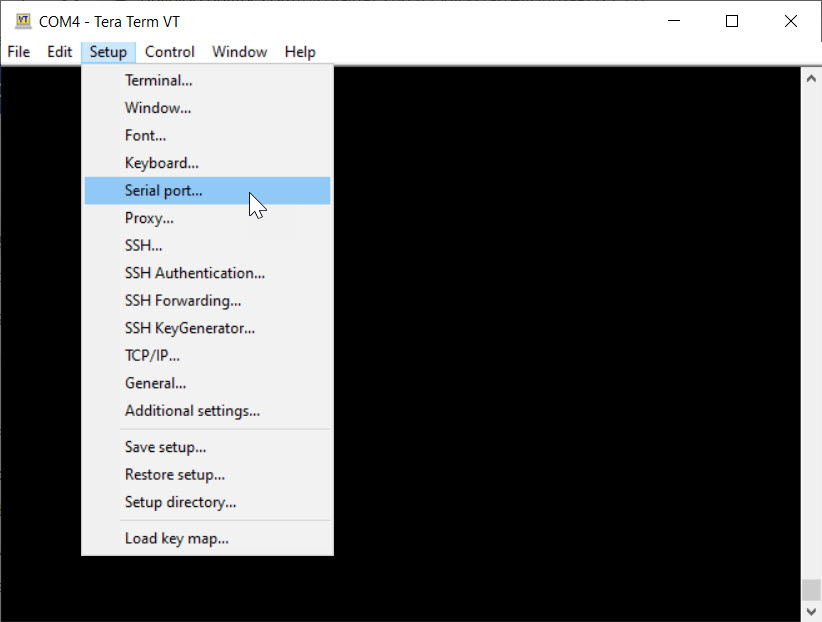
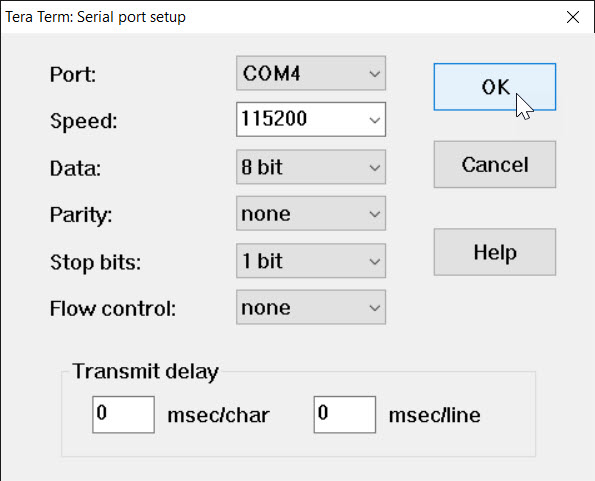
Select a COM port that coresponds to the one USB to RS-232 serial adapter port.
UART5 Setting the Baud Rate
In the terminal window connected to X18 UART3, the development kit default serial port, enter the following to set the communication rate for UART5:
Target (Linux)stty -F /dev/ttyS4 115200
Sending a Message to UART5
Now try sending a message to UART5 terminal (X17). In the X18 terminal, enter the following command:
Target (Linux)echo You did it! > /dev/ttyS4
Take a look at the UART5 terminal.
Expected Output (UART5 console)You did it!
Note
If you have trouble receiving or sending messages to a Console Terminal, ensure that you have the correct COM port set and the terminal is configured for 8 bit data, no parity bits, 1 stop bit, and a baud rate of 115200.
Receiving a Message from UART5
To receive messages from your host machine, set your Linux console to output any incoming data from the UART5 connection:
Target (Linux)cat /dev/ttyS4
Now send a message from the UART5 console to the Linux console. Type anything you want and then hit the “Enter” button.
Enter Ctrl + C in the Linux console to stop waiting for incoming data.