UART
The phyCORE-i.MX7 SOM offers access to up to seven UART interfaces, which are utilized for configuration and data exchange with external peripheral devices. The phyBOARD-i.MX7 kit facilitates easy access to three of these interfaces through expansion connectors.
By default, the phyCORE-i.MX7 development kit is configured to use UART1 (ttymxc0 in the device tree) for Linux console input and output. The UART1 signal is accessible through a micro-USB connector (X6) via an FTDI chip (U1) on the expansion header PEB-D-RPI. PHYTEC recommends allocating UART1 for console access on custom designs.
This guide will walk you through the steps necessary to verify the functionality of UART5, which is also available via the RS-232 serial interface at connector X2 (ttymxc4).
Requirements
USB to RS-232 Serial Adapter (included with your kit)
F/F Null Modem Cable
D-Sub DB9 9 Pin Male Connector To FC-10P IDC Female 2.54mm (included with your kit)
Hardware Setup
Power off and remove the power supply from the development kit.
Target (Linux)poweroff
Attach the blue 9-pin end of the DB9 cable to one end of the Null cable. Then, connect the other end of the Null cable to the USB to RS-232 cable.
Connect the D-Sub DB9 cable to X2 connector. Be sure to line up the red line (pin 1) with pin 1 on X2.
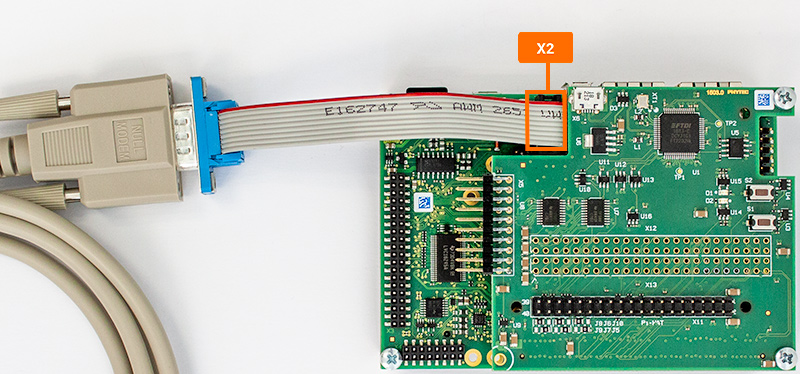
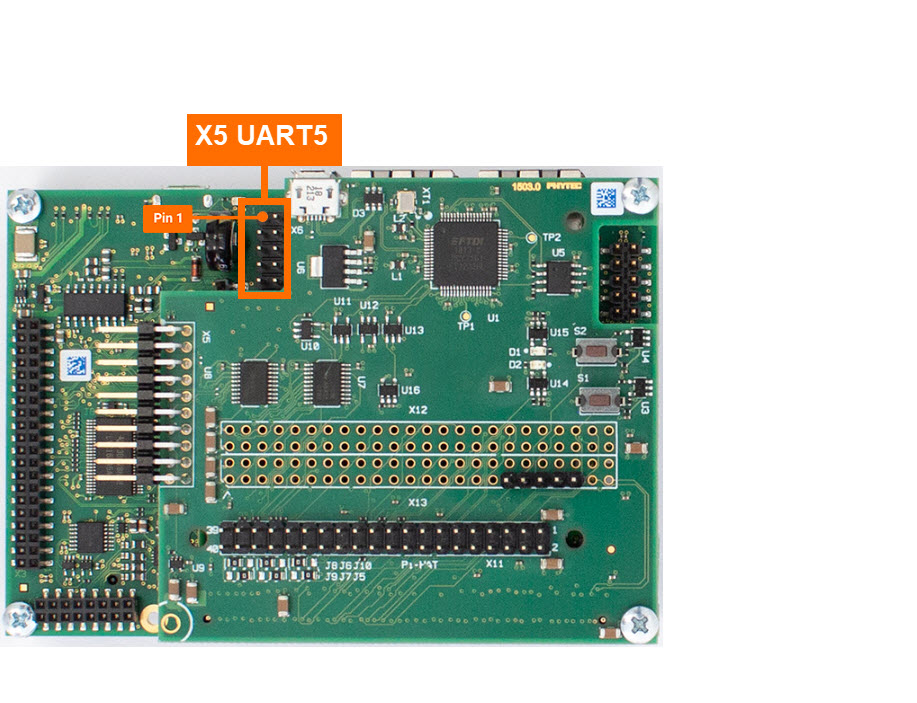
Power the development kit back on.
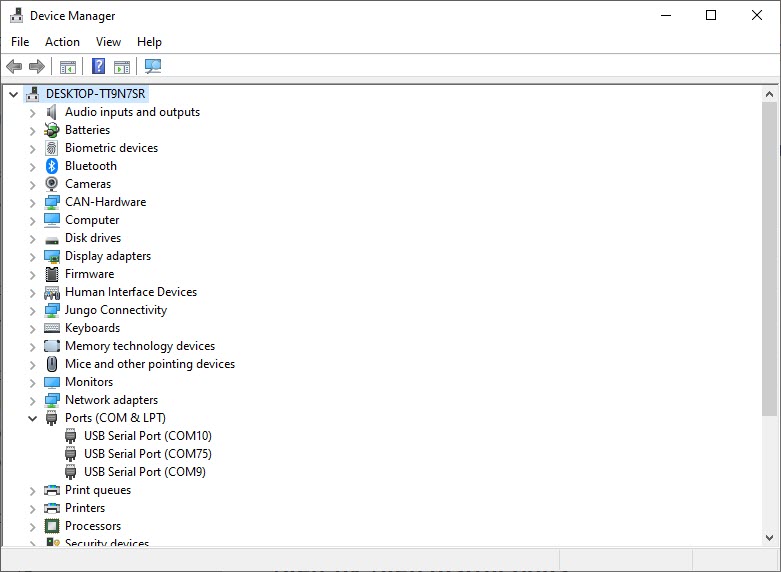
Open your host system’s Device Manager and expand Ports (COM & LPT).
Note
Windows systems can press the Windows key, type “device manager” and press ENTER.
Connect the USB end of the USB to RS-232 cable to the Host machine.
Open the device manager on your host machine.
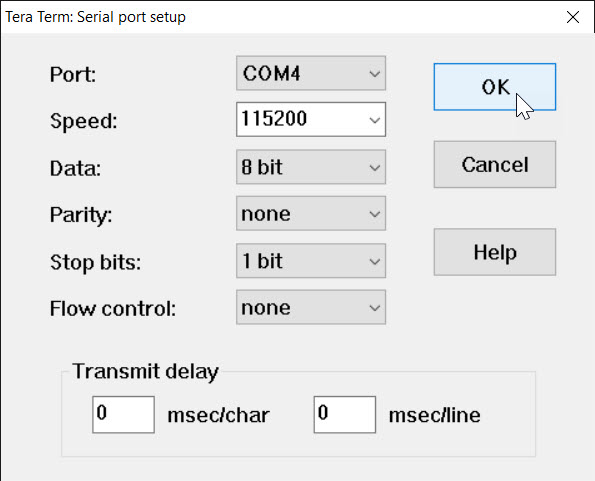
Take note of any new device names that appear under “Ports”. You’ll need the COM port device number in the next steps.
Terminal Setup
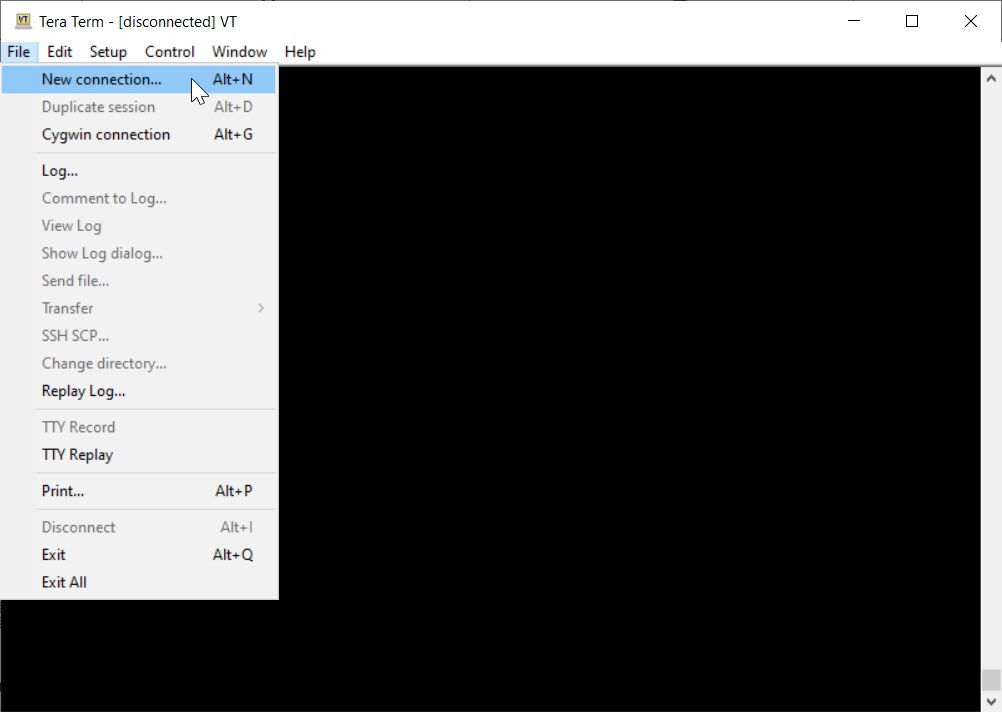
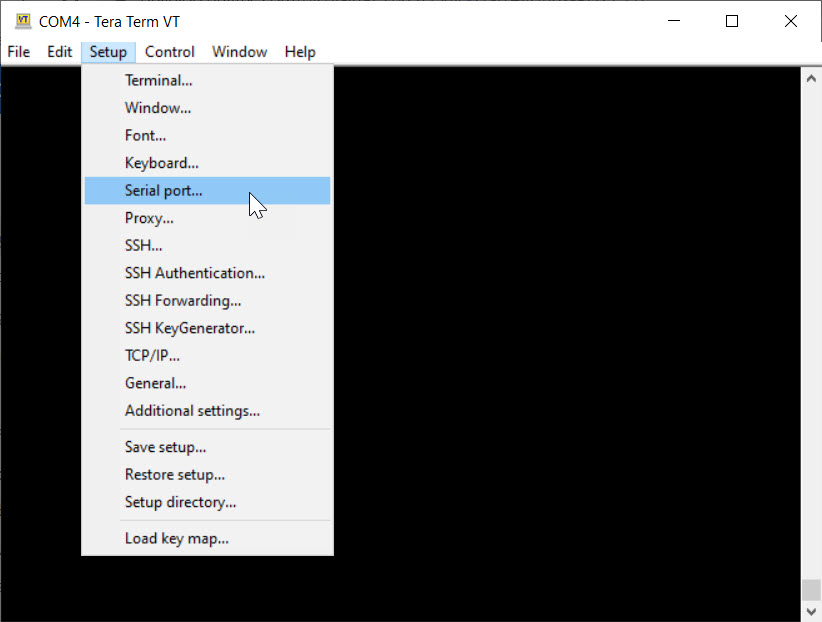
Open a new terminal window. This guide will be using TeraTerm but other emulators like PuTTY will work as well.
Setting the Baud Rate
In the terminal window connected to X6, the development kit default serial port, enter the following to set the communication rate for UART5:
Target (Linux)stty -F /dev/ttymxc4 115200
Sending a Message to UART5
Receiving a Message from UART5
To read messages from UART5, set your debug console to output any incoming data from the UART5 connection:
Target (Linux)cat /dev/ttymxc4
Now send a message from the UART5 console to the debug console. Type anything you want and then hit the “Enter” button.
Expected Outputroot@phyboard-zeta-imx7d-1:~# cat /dev/ttymxc4 Hello World
Enter Ctrl + C in the Linux console to stop waiting for incoming data.
Enable UART5 as a Console in Linux
To enable UART5 as an additional console in Linux, run the following commands. Note that this setting will persist between boots but will not affect the default console in U-Boot and Linux.
systemctl enable serial-getty@ttymxc4.service
systemctl start serial-getty@ttymxc4.service
   ____   _   _ __   __ _____  _____   ____
  |  _ \ | | | |\ \ / /|_   _|| ____| / ___|
  | |_) || |_| | \ V /   | |  |  _|  | |
  |  __/ |  _  |  | |    | |  | |___ | |___
  |_|    |_| |_|  |_|    |_|  |_____| \____|

     _     __  __  ____   _      ___  ____   _   _ __   __
    / \   |  \/  ||  _ \ | |    |_ _||  _ \ | | | |\ \ / /
   / _ \  | |\/| || |_) || |     | | | |_) || |_| | \ V /
  / ___ \ | |  | ||  __/ | |___  | | |  __/ |  _  |  | |
 /_/   \_\|_|  |_||_|    |_____||___||_|    |_| |_|  |_|


ampliPHY Vendor xwayland (Phytec Vendor Distribution) BSP-Yocto-NXP-i.MX7-PD23.1.0 phyboard-zeta-imx7d-1 ttymxc4

phyboard-zeta-imx7d-1 login:
