Modifying the BSP
There can be a significant learning curve to working with The Yocto Project and this guide will serve as a resource for developers to quickly test changes to the BSP. After working through this guide, you should be able to comfortably navigate the BSP and manually introduce custom modifications on-top of it in order to evaluate the interfaces and functionality required by your custom application.
Note
In order to follow this guide, you must have first built the BSP in its entirety and have your BSP environment initialized. Checkout the Build the BSP guide if you haven’t yet!
The built BSP has two primary directories at its root and these are the /sources and /build directories. These two directories are significant and here is a summary of why (the paths here may be slightly different for you if you deviated from the instructions):
~/BSP-Yocto-FSL-i.MX8X-PD21.1.0/sources - This directory contains meta-layers. Meta-layers are repositories that contain instructions for fetching, building and deploying certain software packages. Layers can also contain instructions for changing recipes and settings introduced by other layers. This powerful override capability is what allows you to customize the supplied meta-phytec or community layers to suit your product requirements. The instructions included in meta-layers are typically referred to as recipes.
~/BSP-Yocto-FSL-i.MX8X-PD21.1.0/build - This directory is used by the build system during the build process and is generally referred to as $BUILDDIR in the documentation. Packages called for by the build target, as defined by their recipes are fetched, unpacked, compiled and staged for deployment here.
Note
It is important to distinguish between modifying the local sources of a particular package and modifying the recipe for a given package!
If you are new to working with The Yocto Project, then the Yocto Project Overview and Concepts Manual will be a good document to read through to get a high level understanding of what is going on. The Yocto Project Reference Manual is the best resource for in-depth documentation regarding directory structure, recipes, tasks, and other aspects of actually working with the BSP’s build system.
Adding Packages to the BSP
Note
The packages included by default in the imx-image-multimedia build target should allow you to do most of your development directly on the target if you wanted to (short of modifying the kernel to accommodate custom hardware).
The best way to quickly check what packages are available on the target image is to check the image manifest, which is a file that is deployed along with the imx-image-multimedia build target. Use the following to open this file:
vim $BUILDDIR/tmp/deploy/images/imx8x-phycore-kit/imx-image-multimedia-imx8x-phycore-kit.manifest
If there is a package that you need that wasn’t included in the target image by default, then you should first check if the package was included in the build tree.
cd $BUILDDIR

#lists all available packages
bitbake -s

#search for specific packages by name
bitbake -s | grep <package name>
If the package you need is listed then you can add the package to the image by simply adding the following line to the end of your build’s conf/local.conf file:
IMAGE_INSTALL_append = " <package name1> <package name2>"
Adding these packages to the target image by way of the conf/local.conf file is some what of a temporary way to introduce packages and you will eventually add these in a more permanent way in your custom meta layer.
Warning
The IMAGE_INSTALL_append variable can hold a space separated list of packages you wish to add to the default BSP. Note that the leading space in the list is necessary!
If the package you need is not listed, then this means that either PHYTEC or the silicon vendor (NXP in the case of the phyCORE-i.MX8X) did not support the meta-layer needed for that package by default. If this is the case, you may need to find a community layer which introduces the recipe/package you need. Community layers can be searched on the Open Embedded Layer Index, just make sure you are searching the correct Yocto version for your BSP, PD21.1.0 uses Yocto v3.0, Zeus.
Note
Adding meta-layers to the BSP that aren’t included in the build tree by default is discussed in the Create a Custom Meta Layer guide.
Modify the Kernel Config
The BSP’s build system also includes kernel development tasks for interacting with the Linux kernel’s own menuconfig tool, which is a graphical tool for configuring the driver support included in the kernel.
Launch the menuconfig tool with the following command:
bitbake linux-phytec-fsl -c menuconfig
Once menuconfig launches, you can navigate the available configuration options using the arrow keys on your keyboard to enable or disable support as required. We’ll walk through an example:
First, navigate to Device Drivers → Sound card support.
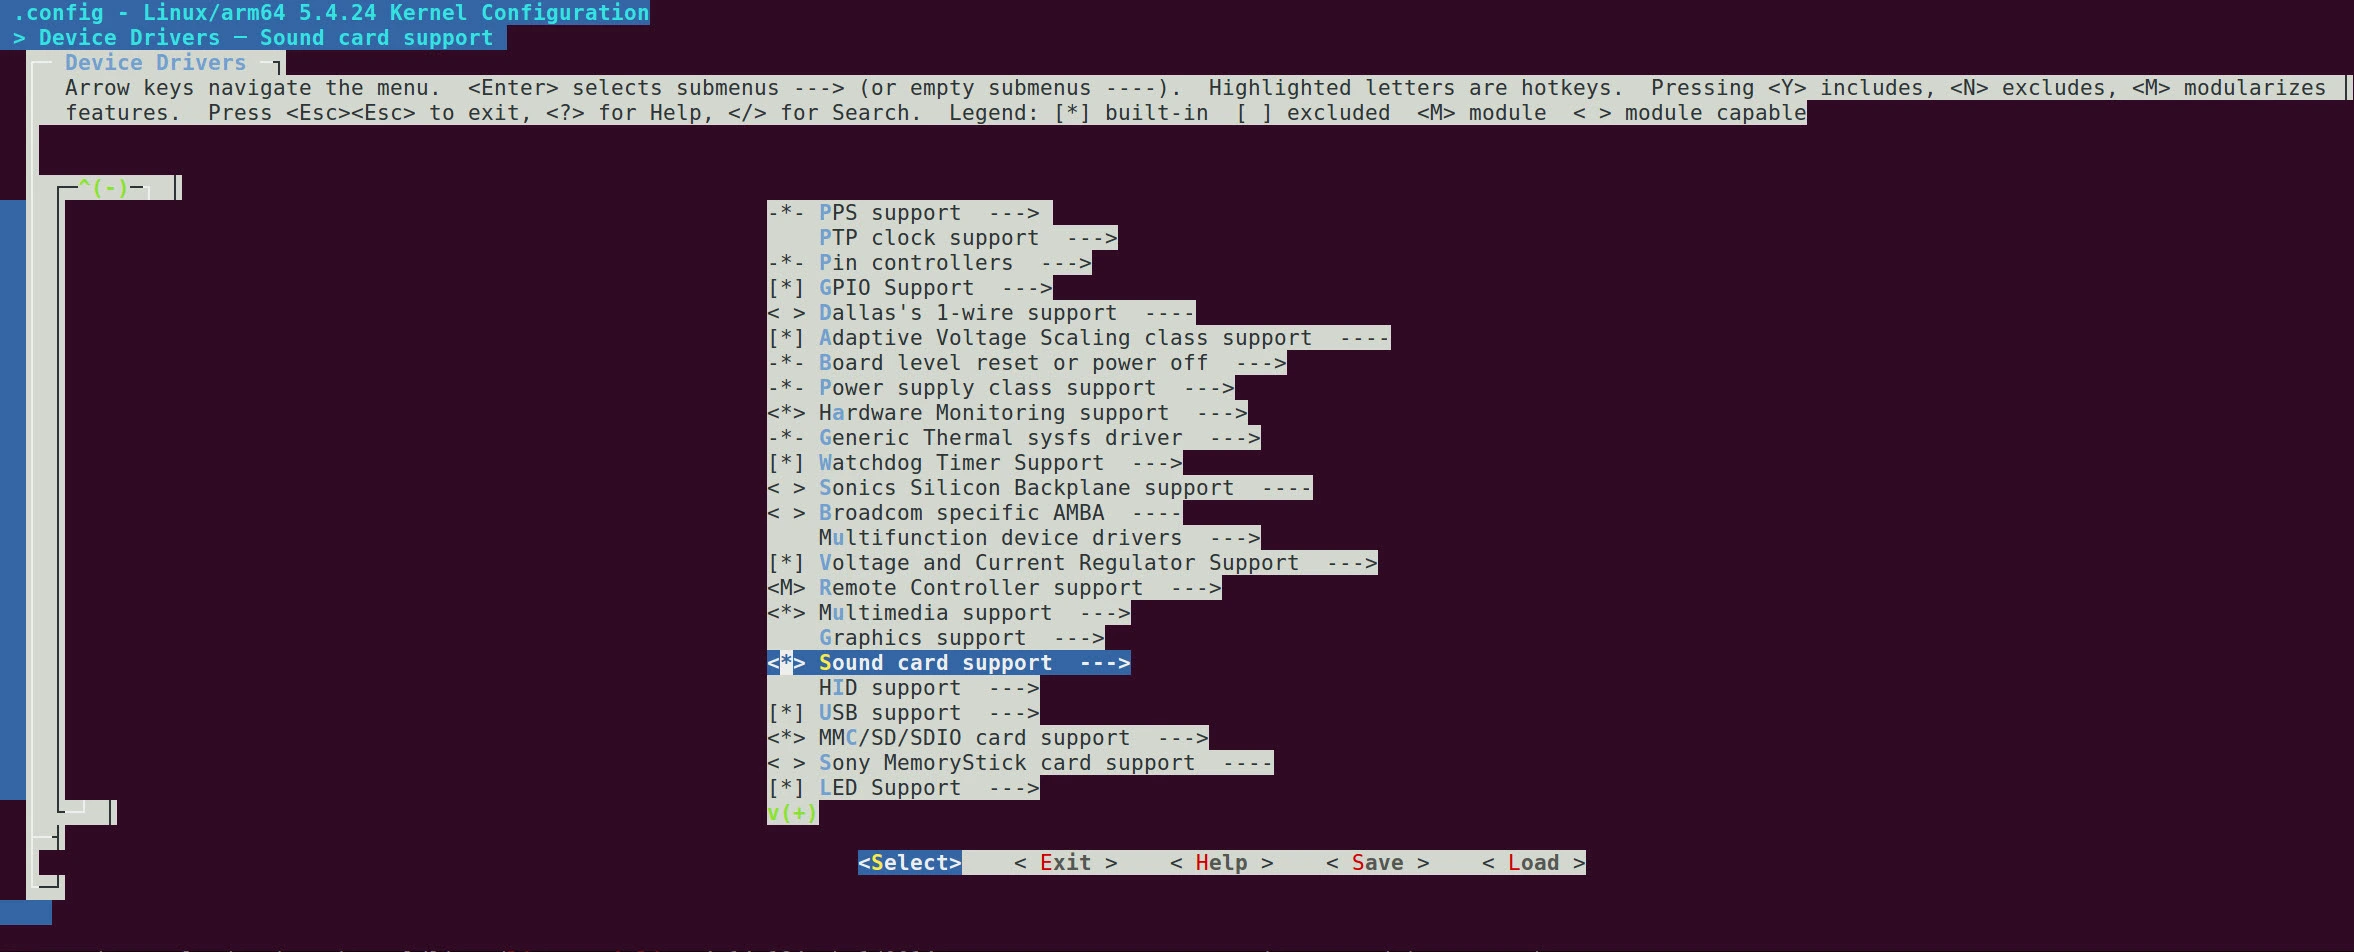
Sound card support is enabled by default and for this example we will disable it. To do this, toggle the Sound card support off using the space bar.

Remember to save your new configuration to the .config file before exiting menuconfig.
The .config used by the build system can be found at $BUILDDIR/tmp/work/imx8x_phycore_kit-poky-linux/linux-phytec-fsl/5.4.24-r0/build/.config and you could back this up to a safe location outside of the BSP to eventually define your defconfig in your custom meta layer like so:
cp $BUILDDIR/tmp/work/imx8x_phycore_kit-poky-linux/linux-phytec-fsl/5.4.24-r0/build/.config ~
Tip
Files that start with a ‘.’ are typically hidden in the filesystem. If you are having trouble seeing the .config file then try the following command to list everything (including hidden files) in the directory you are searching:
ls -a <path to .config>
Feel free to open the .config file with a text editor to verify that your change made it there. You’ll notice that the previous and original .config files are also backed up, which you could diff against to see what has changed.
Once you have saved your changes to the .config, you can force a re-compile of just kernel to make those changes take a effect:
cd $BUILDDIR
bitbake linux-phytec-fsl -c compile --force
The do_deploy task follows the do_compile task. In order for the change to also make its way into the binaries generated in the deployment directory, you now need to re-deploy the kernel independently or as part of the overall target image.
bitbake linux-phytec-fsl

# or

bitbake imx-image-multimedia
Modify the BSP’s Kernel Source Directly
Once the BSP is built the first time, you will have access to deployed binaries as well as the local sources that were used to build them. It is possible to make changes to these local sources and re-compile them directly in the BSP. This guide will use the linux-phytec-fsl package as an example but the information outlined here will be applicable to other packages such as the bootloader and others too.
Warning
The Yocto Project isn’t really intended for serious development of the individual packages called for by the recipes in the BSP’s meta-layers, it’s really meant to generate production-ready images. If you are considering significant modifications to the Linux kernel (perhaps you need to port an upstream driver), you are better off cloning the kernel repo independently outside the scope of the BSP to focus on that development alone first. Once major changes for a package are finalized, a new recipe can be created that extends the existing kernel recipe in the BSP and just applies your changes as a set of patches to the base package. Checkout the Standalone Kernel Development guide for more information on this.
Changes made directly to the local sources of a package should not be considered permanent, they can be easily destroyed if the package is cleaned and re-fetched by the build system.
The goal of this guide is to provide you with a way to perform quick and informal changes to the kernel or other packages for testing on the phyCORE-i.MX8X development kit. This is handy if you need to quickly enable a driver or GPIO instance, for example.
This section of the guide won’t focus on applying changes to the BSP components in the “correct way” by use of a custom meta-layer. For instructions on that process, checkout the Create a Custom Meta Layer guide when you are ready to begin consolidating all your changes to the stock BSP.
Change the Linux Kernel Device Tree
Let’s try making a small change to the kernel’s device tree and enable a heartbeat LED using the User LED D31 to let us know that the system is alive automatically upon boot (this User LED doesn’t do anything by default, checkout the GPIO guide to learn more about it):

Use your favorite text editor to open the main device tree file for the phyCORE-i.MX8X development kit:
vim $BUILDDIR/tmp/work/imx8x_phycore_kit-poky-linux/linux-phytec-fsl/5.4.24-r0/git/arch/arm64/boot/dts/phytec/phytec-imx8qxp-phycore-rdk-emmc.dts
Add the following device tree code to the end of the file. This code both re-muxes the processor pin connected to the D31 User LED as a GPIO and ties the leds-gpio.c driver to the pin to give us the heartbeat functionality:
/ {
      leds {
              compatible = "gpio-leds";
              pinctrl-names = "default";
              pinctrl-0 = <&pinctrl_leds>;

              user-led1 {
                      label = "green:user1";
                      gpios = <&lsio_gpio0 28 GPIO_ACTIVE_HIGH>;
                      linux,default-trigger = "heartbeat";
              };
      };

};

&iomuxc {
        pcm942 {
                pinctrl_hog: hoggrp {
                        fsl,pins = <
                                IMX8QXP_SAI1_RXC_LSIO_GPIO0_IO30       0x06000021        /* USBOTG1 Port Select */
                                IMX8QXP_MCLK_OUT0_ADMA_ACM_MCLK_OUT0   0x0600004c        /* Audio Clock*/
                                IMX8QXP_SAI1_RXFS_LSIO_GPIO0_IO31      0x06000021        /* CAN Fault */
                                IMX8QXP_SPI0_CS1_LSIO_GPIO1_IO07       0x06000021        /* ETH1 OR Gate */
                        >;
                };

                pinctrl_leds: ledsgrp {
                        fsl,pins = <
                                IMX8QXP_SAI0_TXFS_LSIO_GPIO0_IO28      0x00000021        /* User LED */
                        >;
                };
        };
};
Remember to save your changes!
Warning
Running the clean task at this point for either the linux-phytec-fsl target itself or the overall target image will destroy the changes. The clean task instructs the build system to delete the unpacked sources for a given target which would also destroy the changes made there.
Force the Change to Get Compiled When testing changes applied directly to the build’s local sources (in $BUILDDIR), the build system will not automatically detect that the local source has changed unless you specifically instruct the build system to recompile it first. This means that you can’t just modify the kernel source at $BUILDDIR/tmp/work/imx8x_phycore_kit-poky-linux/linux-phytec-fsl/5.4.24-r0/git and expect the build system to automatically take the change into account the next time ‘bitbake imx-image-multimedia’ is run.
The following command should be used after applying some change directly to the local kernel source in the $BUILDDIR/tmp/work/imx8x_phycore_kit-poky-linux/linux-phytec-fsl/5.4.24-r0/git, such as we did above when we added the code to enable the heartbeat LED:
cd $BUILDDIR
bitbake linux-phytec-fsl -c compile --force
Once the kernel is forcefully recompiled, you can re-deploy it independently or as part of the overall target image:
bitbake linux-phytec-fsl

# or

bitbake imx-image-multimedia
Using the newly deployed image to boot the phyCORE-i.MX8X development kit should quickly confirm that the User LED D31 is blinking and that the kernel modification was successfully applied.
Save the Change
Keep in mind that manual changes applied directly to the sources in $BUILDDIR are temporary since they aren’t being tracked by the build system yet. For this section of the guide, we will assume you made some kernel change (such as heartbeat LED change demonstrated above) and that you are satisfied enough with the change that you would like it to apply automatically to the BSP whenever it is built.
The first thing to do is to export the change as a patch file. To do this, navigate to the package repository you modified:
cd $BUILDDIR/tmp/work/imx8x_phycore_kit-poky-linux/linux-phytec-fsl/5.4.24-r0/git
Before actually creating the patch, you may want to review the changes made to the repository to ensure everything is as you expect it. Use git to do this:
git diff
git status
Export a patch file based on the current changes applied on-top of the base kernel and save it to a safe location outside the BSP, perhaps your home directory:
git diff > heartbeatD31.patch && cp heartbeatD31.patch ~
Patch files work best when they capture changes that are very specific in their purpose. For example, instead of having one “mega” patch that enables all the unique features of your custom system, break up your customizations such that each patch is responsible for a specific interface or driver. This will make maintaining your meta-layer much easier later on.
Note
Eventually, you will have a set of patches that modify the functionality of the phyCORE-i.MX8X SOM in a way that is specific to your application requirements and the design of your custom carrier board (if applicable). This collection of patches should eventually be consolidated into a custom Meta-Layer specific to your system and added in a modular way to the BSP. Checkout the Create a Custom Meta Layer guide when you are ready to begin finalizing your production image.
Clean Packages
When testing changes, it will be necessary to get back to a known working-starting point at some time or another. To do this, all recipes have a do_clean task defined that instructs the build system to delete all the unpacked sources for a given target (including the changes manually applied there). The next time the same package is built, it will be re-unpacked from the cached source tarball which effectively reverts your changes back to their original BSP defaults.
Clean the package:
bitbake linux-phytec-fsl -c clean