Eclipse IDE Setup
This guide will walkthrough the setup of the Eclipse IDE to cross-develop applications for the phyCORE-i.MX8X development kit.
In order to follow this guide, you must have a valid BSP PD21.1.0 SDK installed. Steps for installing the SDK can be found in the Install the SDK guide.
Install Eclipse
To install the Eclipse IDE, run the following command:
sudo apt-get update
sudo apt-get install eclipse
Launch Eclipse once it is installed:
./eclipse
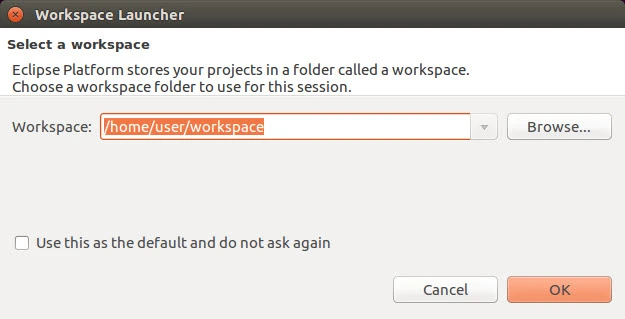
You will be greeted with a window to setup your workspace. The workspace directory will house your development, feel free to create this anywhere you would like but this guide will use the default location as suggested by eclipse so just press OK.
The first time you open the Eclipse IDE, you will also be presented with a Welcome screen. Go ahead and close this:

Adding Eclipse Plug-ins
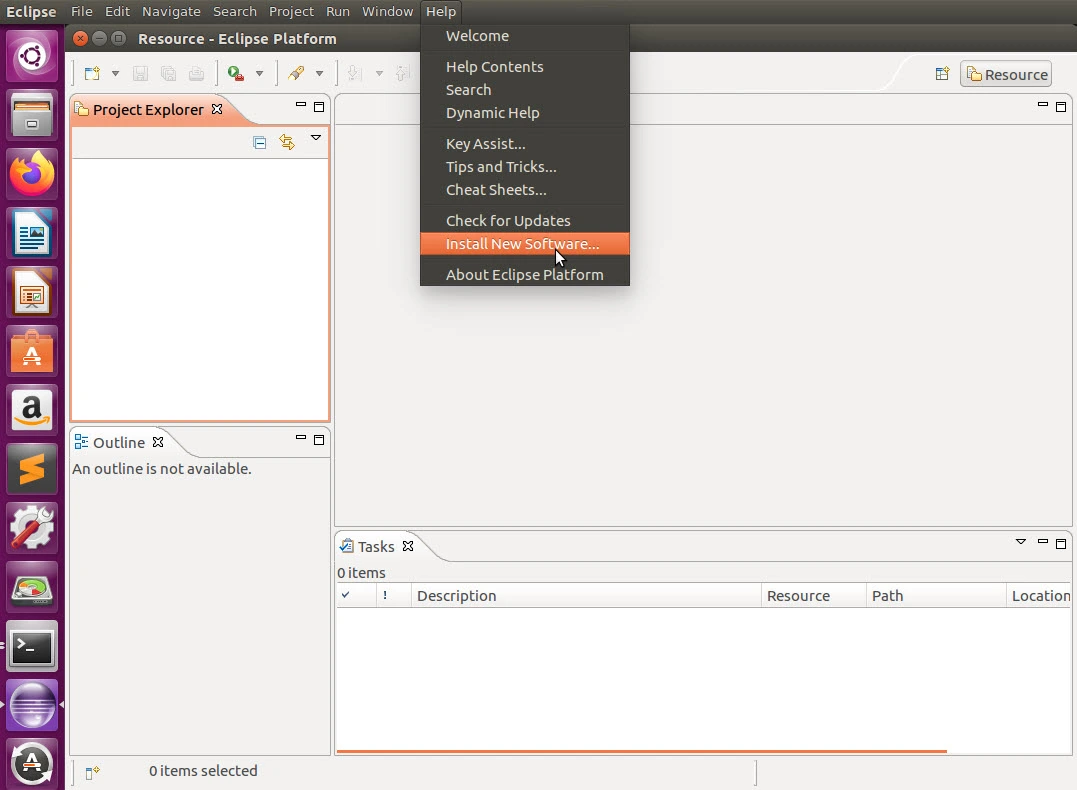
We need to configure this workspace before creating a new project for our phyCORE-i.MX8X. Navigate to Help → Install New Software:
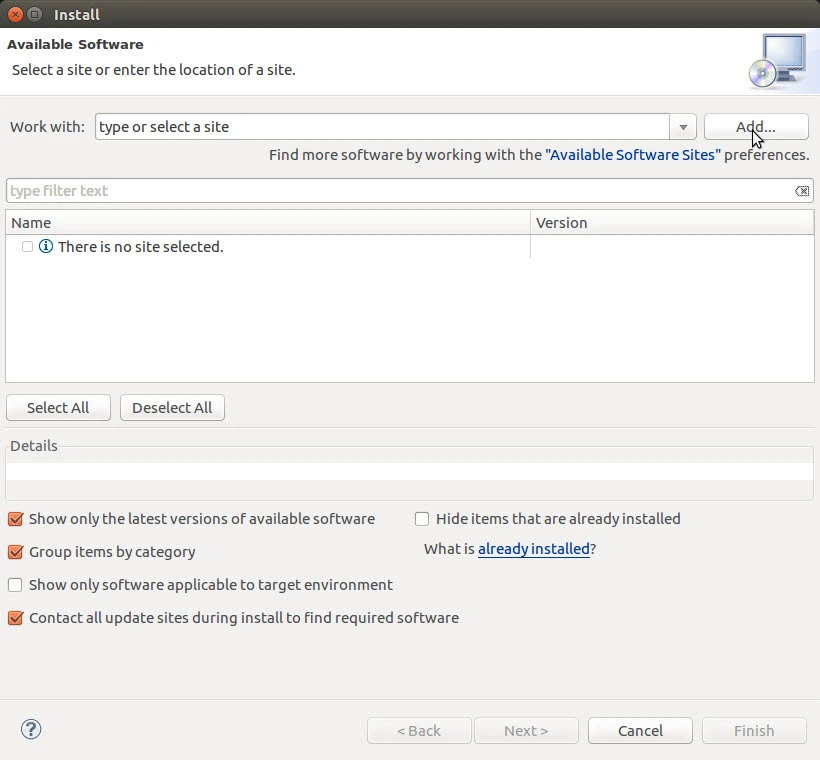
In the Install window that appears, select Add…:
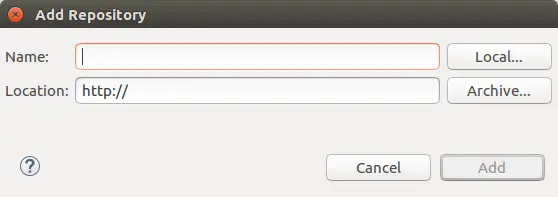
Another window should have popped up for adding a repository.
C/C++ Plug-ins
In the Location field, enter the following URL before selecting Add: https://www.eclipse.org/downloads/packages/release/2019-09
The Install window should now show a couple of plug-in options available for installation. Locate and check-mark the following:
Mobile and Device Development → C/C++ GCC Cross Compiler Support
Programming Languages → C/C++ Autotools Support
Programming Languages → C/C++ Development Tools
Select Next and work through installation of the C/C++ Plug-ins. Once the installation is complete, restart Eclipse.
Tip
You can restart Eclipse manually at anytime by navigating to File → Restart.
Once Eclipse has restarted, let’s grab some more Plug-ins from another location. Navigate to Help → Install New Software.
Add another repository using this URL in the location field this time: http://downloads.yoctoproject.org/releases/eclipse-plugin/1.8/juno/
The Install window should now show some new plug-in options available for installation. Press the Select All button as we are going to install of these plug-ins.
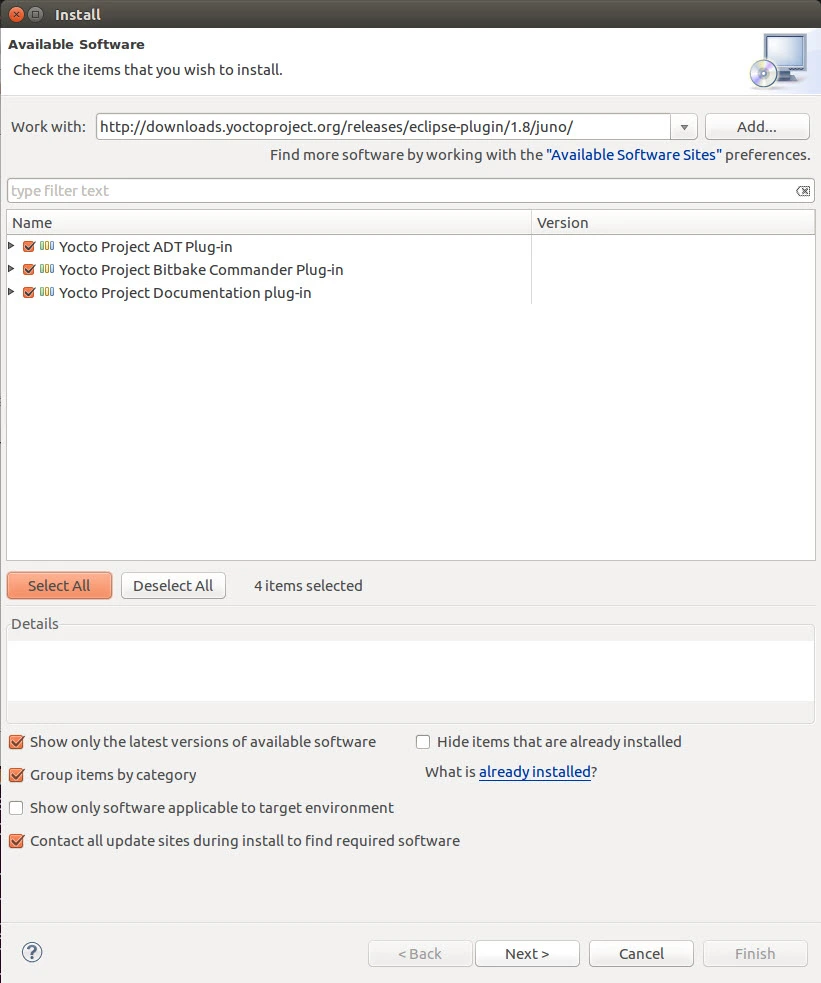
Select Next and work through installation of the Yocto Plug-ins. Once the installation is complete, restart Eclipse.
Configuring the Yocto Plug-in
With the plug-ins installed we now need to further configure the Yocto Plug-in to leverage the phyCORE-i.MX8X Linux BSP PD21.1.0 SDK, which contains both the toolchain and sysroots directory that Eclipse is going to use to cross-compile projects.
Navigate to Window → Preferences:
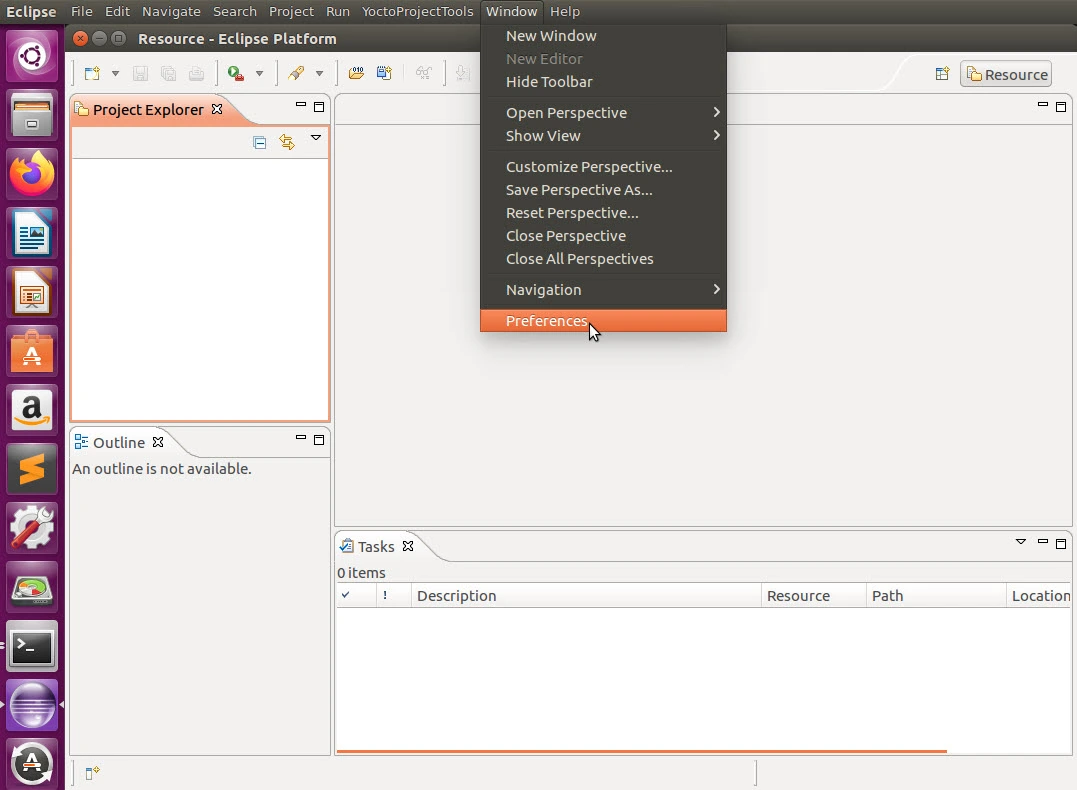
In the Preferences window, in the left side panel, select Yocto Project ADT:
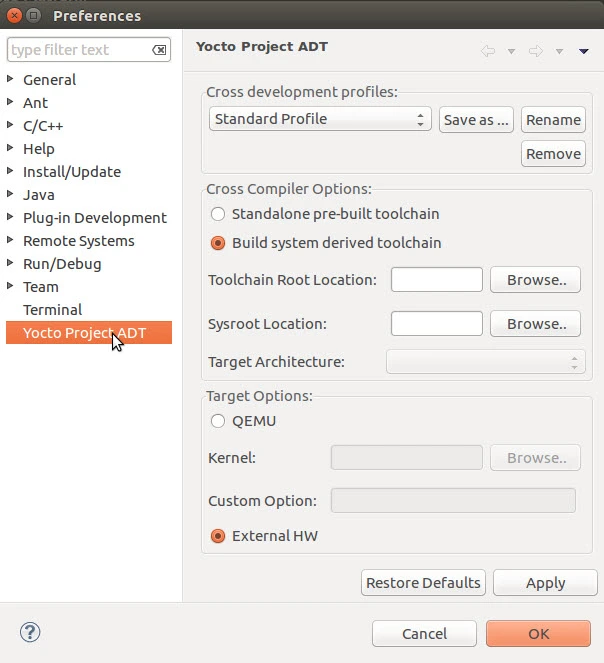
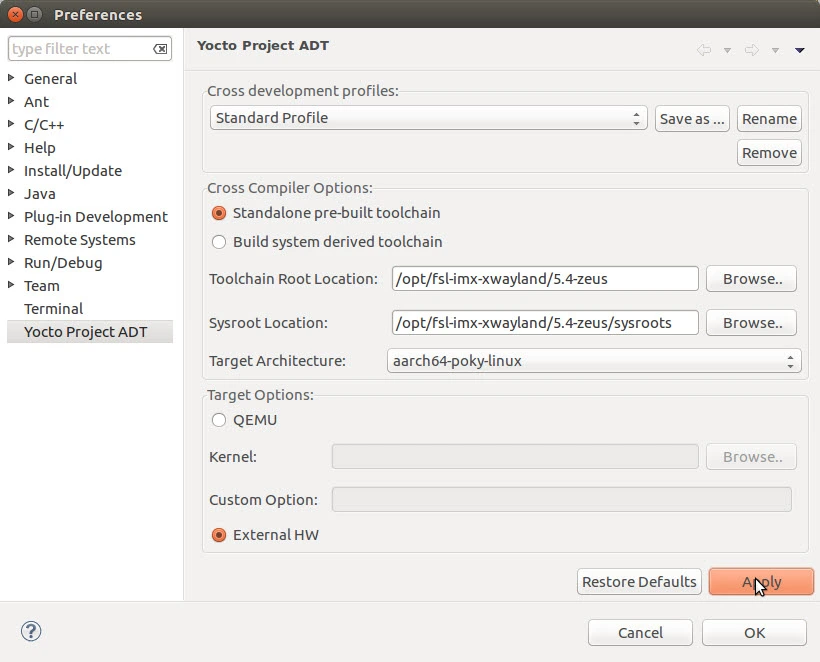
Fill out the fields in the Yocto Project ADT window with the following values:
Cross Compiler Options: Select “Standalone pre-built toolchain”
Toolchain Root Location: Enter “/opt/fsl-imx-xwayland/5.4-zeus”
Sysroots Location: Enter “/opt/fsl-imx-xwayland/5.4-zeus/sysroots”
Note
The toolchain and sysroots locations could be in another location if you did not install the SDK to the default location as suggested by the installer. These fields should reflect wherever you installed the SDK. If you haven’t yet installed the SDK, checkout the Install the SDK guide.
Click Apply and then OK.
Your Eclipse IDE should now automatically source the cross-compilation toolchain upon start up.
Creating and Configuring a New C Project
This section of the guide will setup and build a template Hello World application as a reference for those beginning development on the phyCORE-i.MX8X.
During cross-platform development, one of the biggest consumers of time can be transferring binaries back and forth between your development machine and the phyCORE-i.MX8X target. In an effort to aide in long term development, we will also be adding a post-build step to transfer the binary to the development kit and execute it automatically from within the Eclipse IDE.
Note
In order to complete this guide, the phyCORE-i.MX8X must be connected to your local area network and you must know its IPv4 address. Checkout the Ethernet interface guide for more information about this.
Create the Project
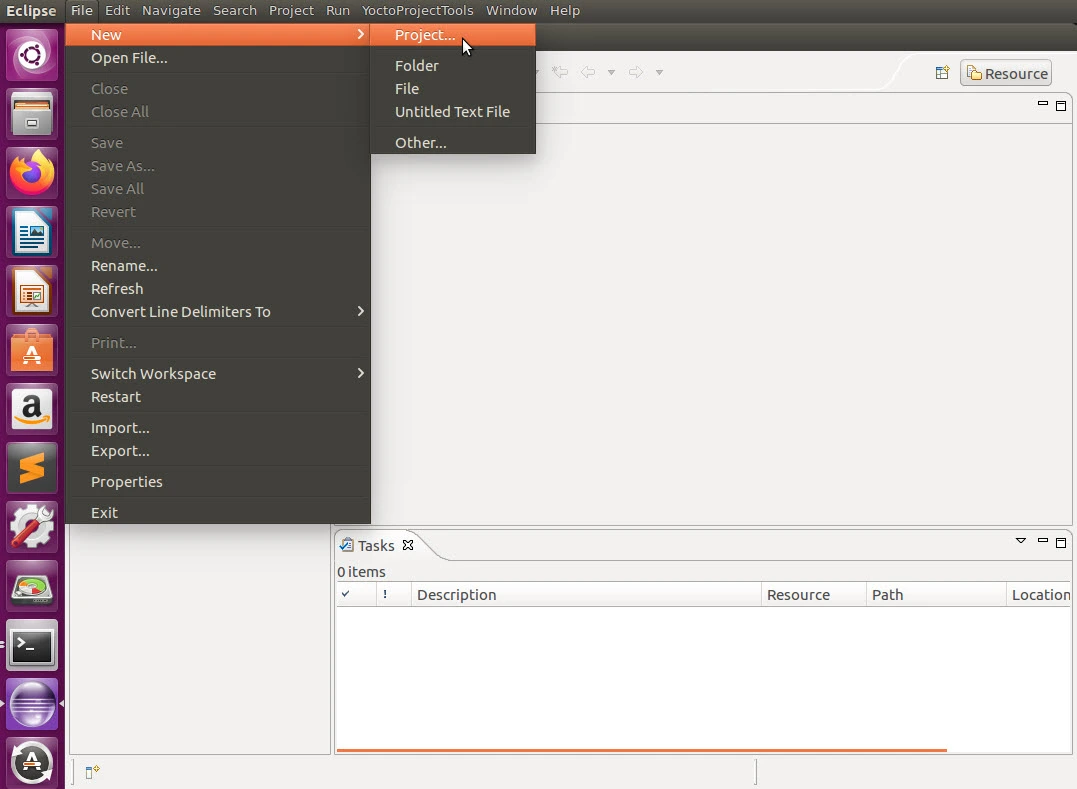
Navigate to File → New → Project:
In the New Project window, navigate to C/C++ → C Project:
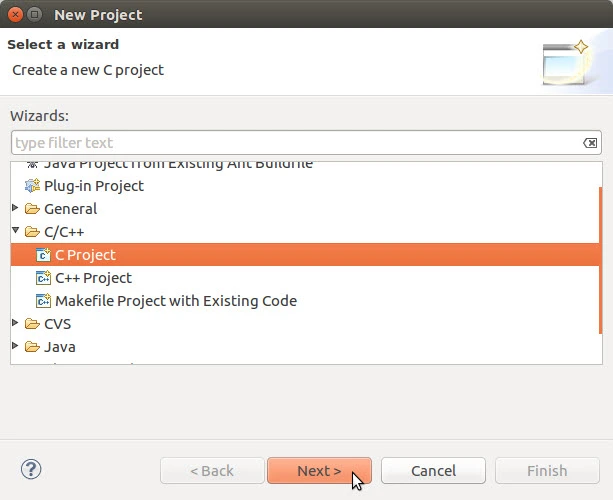
In the C Project window, name the project HelloWorld
For the Project Type, select the Executable → Hello World ANSI C Project
For the Toolchain, select Linux GCC

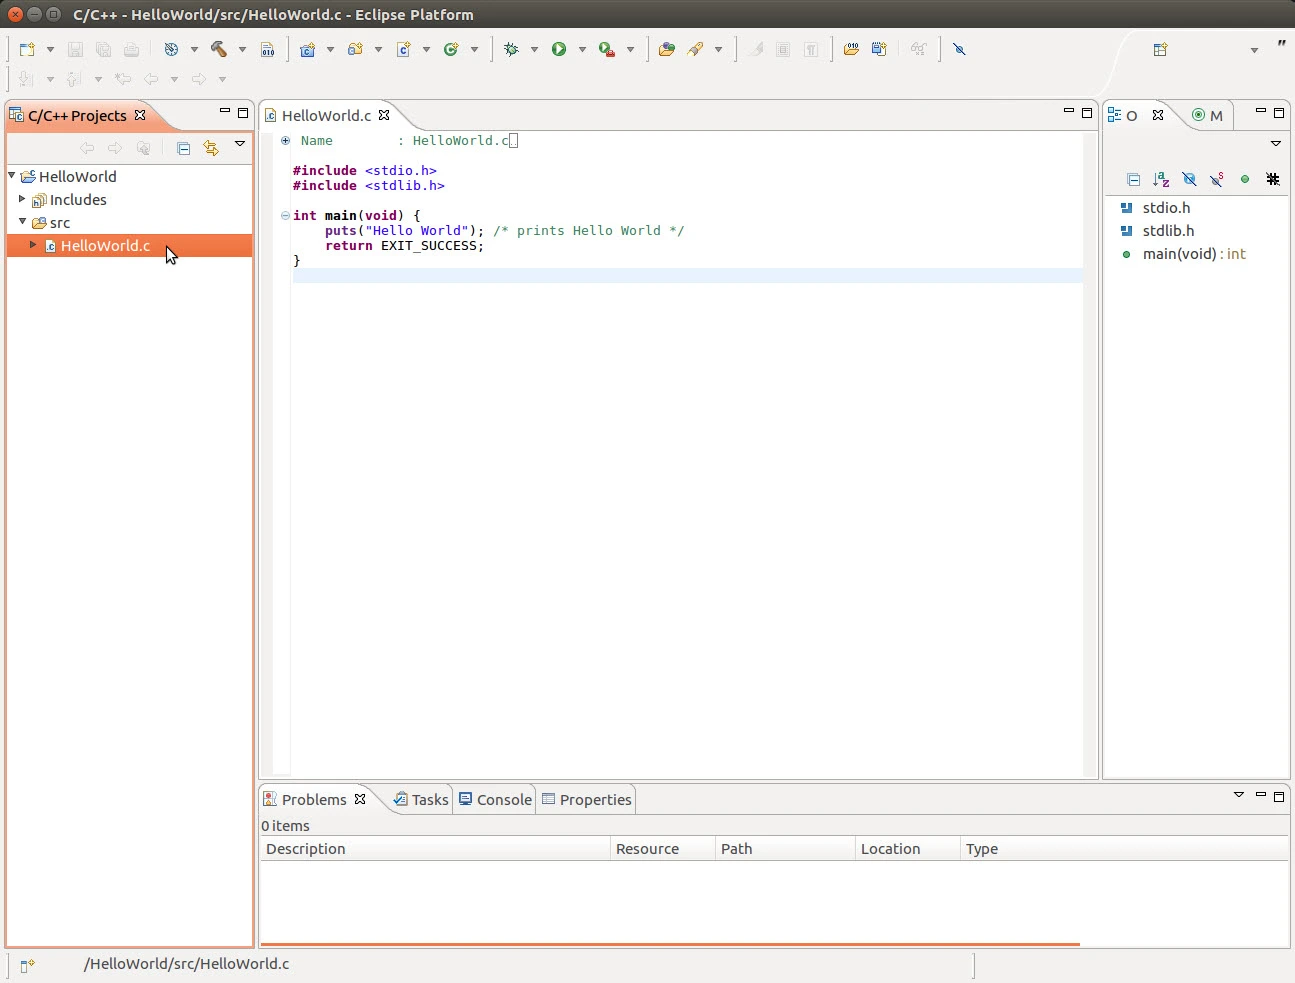
You should now be able to navigate the project in the C/C++ Projects pane on the left.
Configure the Project Properties
Now with the project created, we need to configure the project to leverage the cross-compilation toolchain Eclipse already has sourced.
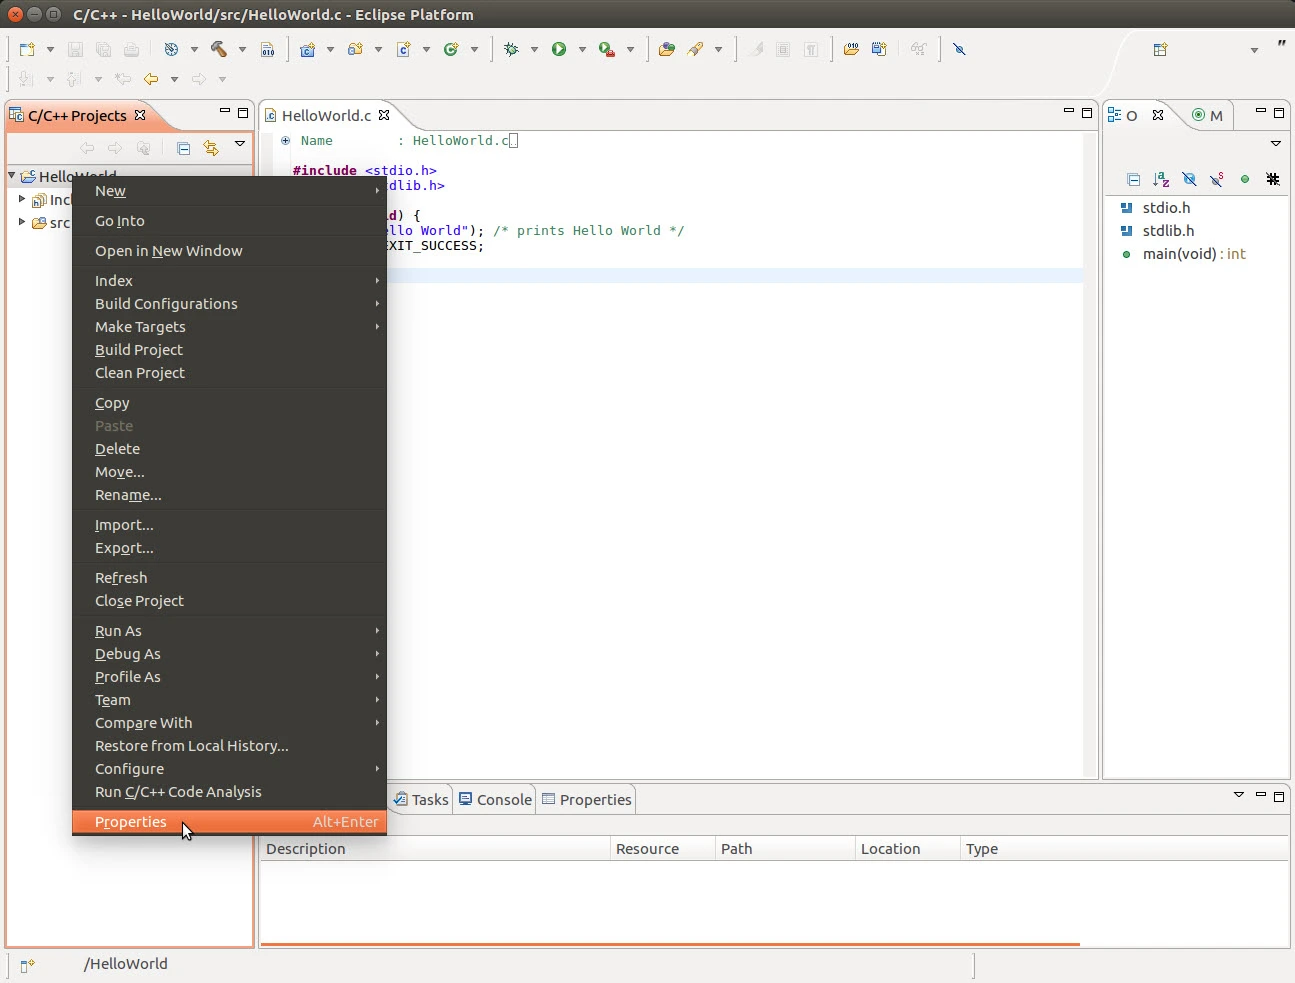
Right click the Project in the C/C++ Projects pane on the left and select Properties
In the Properties window, navigate to C/C++ Build → Settings
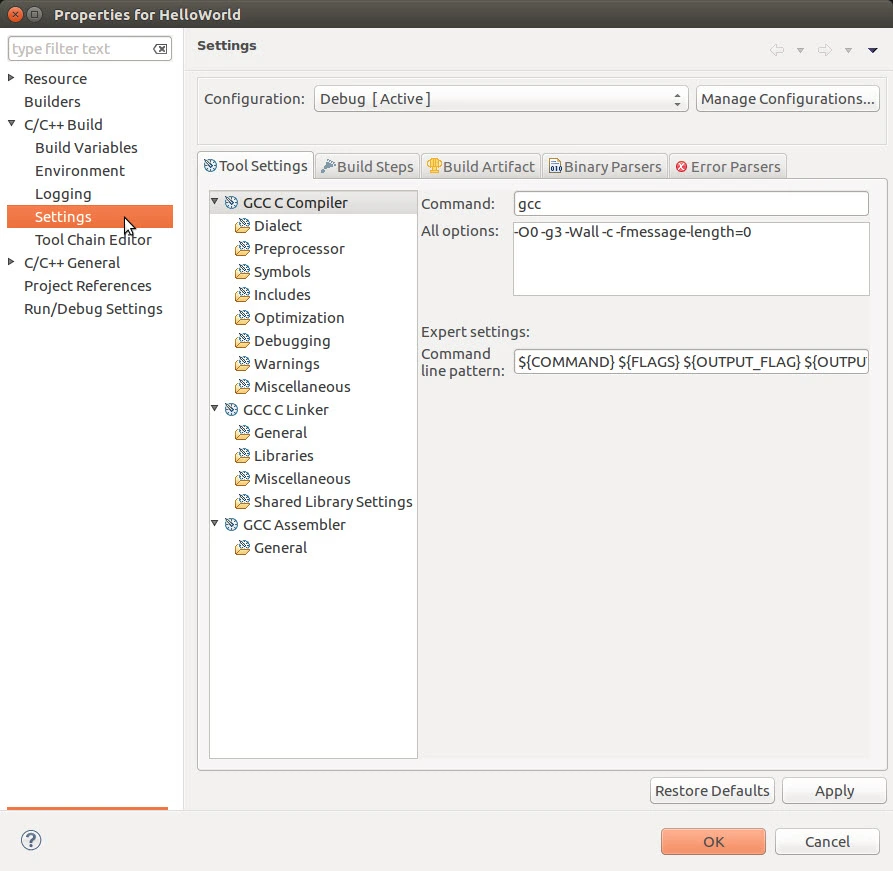
In the Tool Settings pane, select GCC C Compiler and replace the Command field with: ${CC}

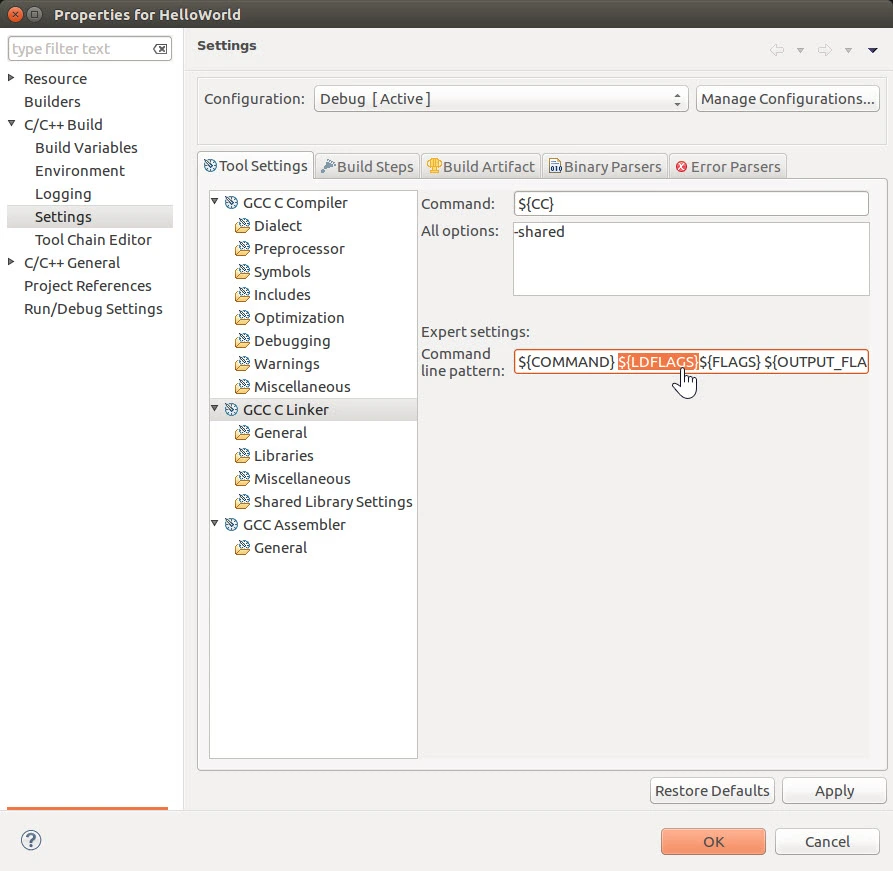
In the Tool Settings pane, select GCC C Linker and replace the Command field with: ${CC}
Also, add ${LDFLAGS} between ${COMMAND} and ${FLAGS} in the “Command line pattern:” field.
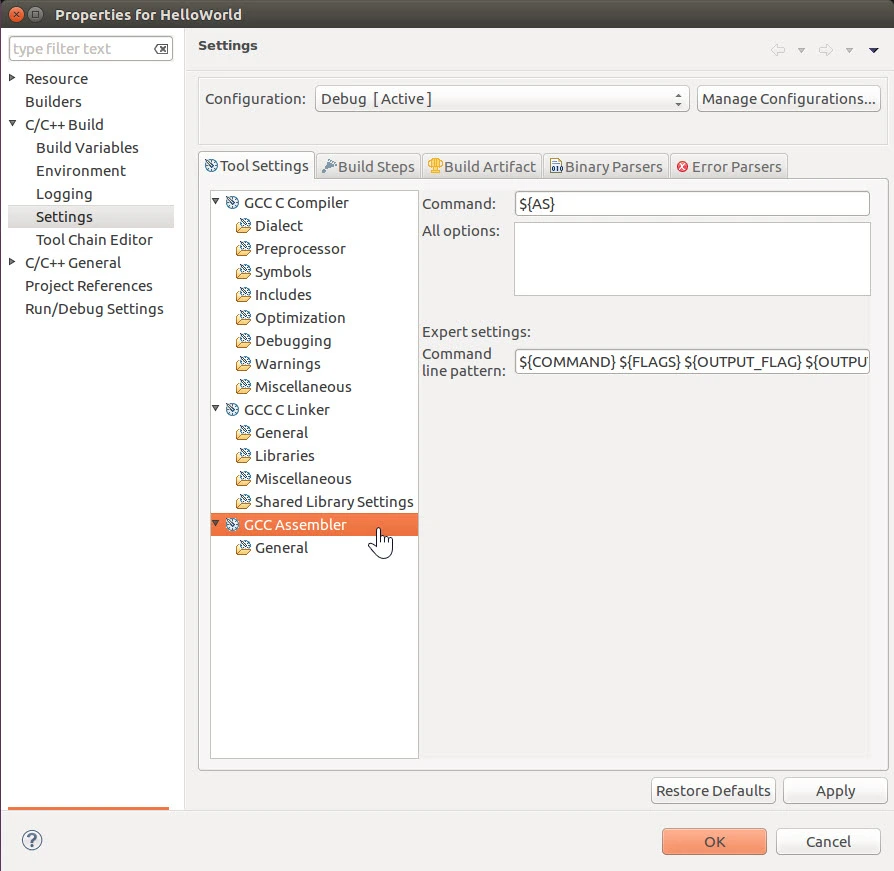
In the Tool Settings pane, select GCC C Assembler and replace the Command field with: ${AS}
Select the Build Steps tab next to the Tool Settings tab:
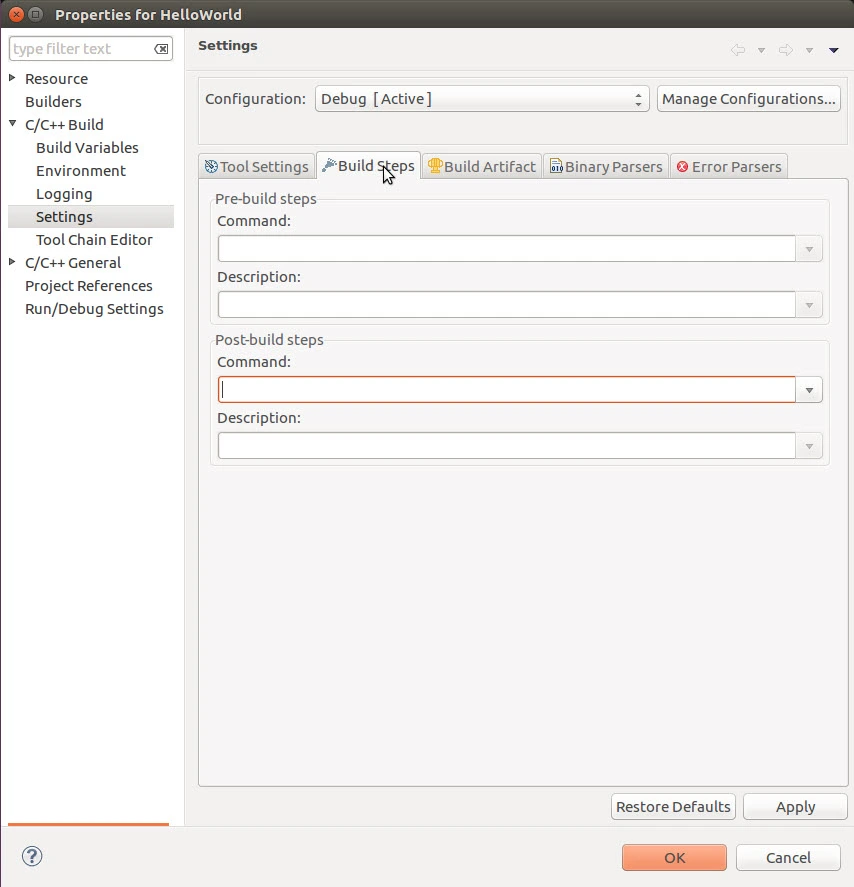
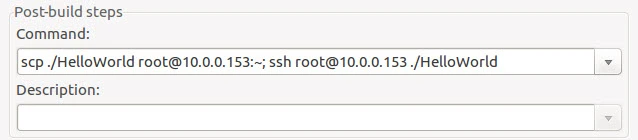
In the Post-built steps Command field, enter the following line (replace the X’s with the IPv4 address of your phyCORE-i.MX8X):
scp ./HelloWorld root@XX.XX.XX.XX:~; ssh root@XX.XX.XX.XX ./HelloWorld
This command is run automatically at the end of the build by Eclipse and it will transfer the output binary for the project to the phyCORE-i.MX8X and execute it there.
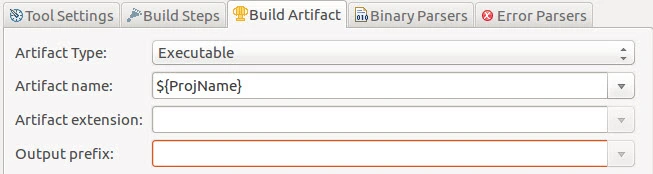
Select the Build Artifacts tab next to the Build Steps tab:
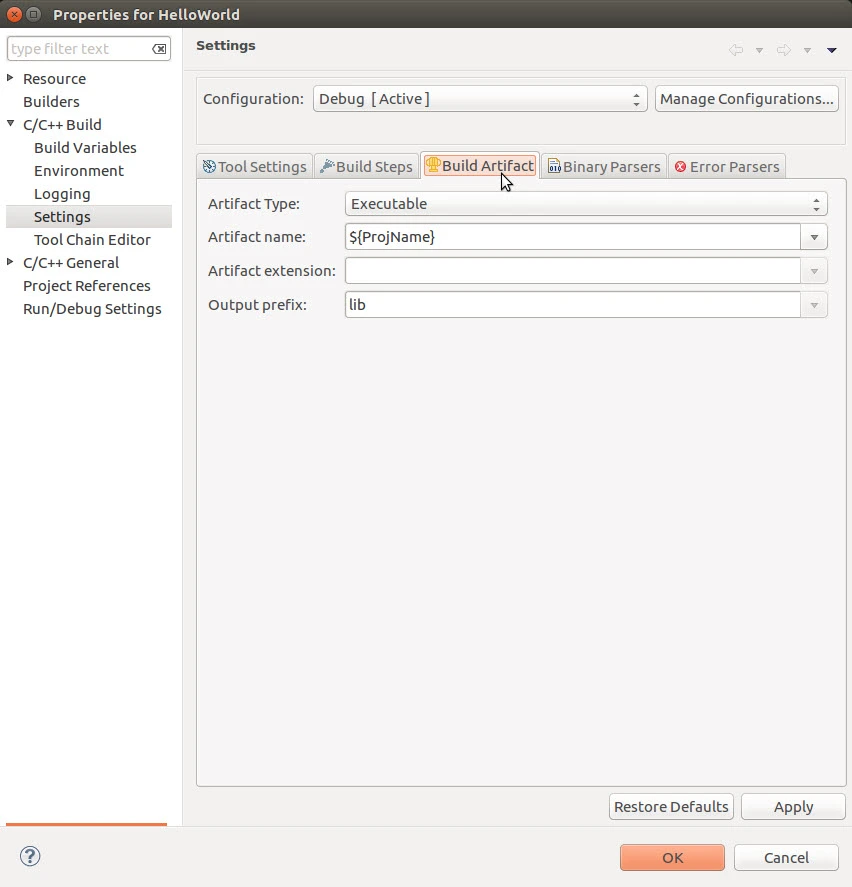
Clear the Output prefix field. This field should have no value when compiling executables.
Select Apply and OK.
Build the Project
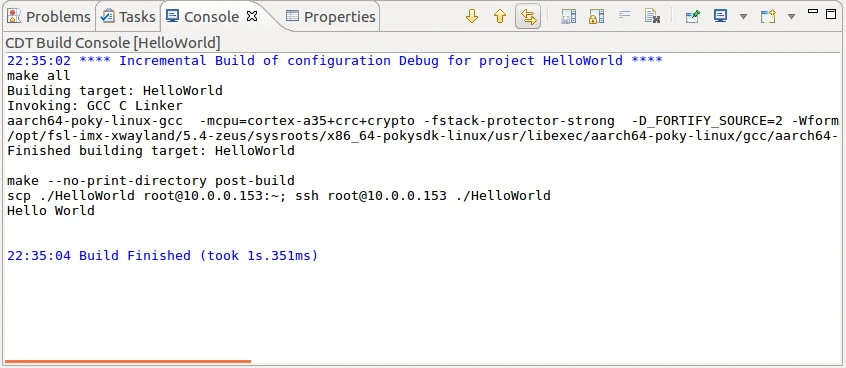
Now that the project is configured, it is ready to be built. To build the project, select the little Hammer icon in the toolbar.
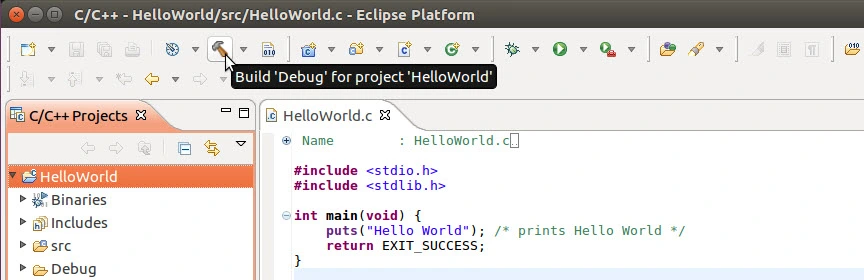
With that, the project should build and Eclipse should automatically process the post-build step. You should see confirmation of the successful build in the IDE console and the “Hello World” message being echoed there from the phyCORE-i.MX8X over the network.
Tip
If your build gets stuck and never seems to complete, try canceling the build and removing the post-built step to see if this was the issue. You might need to double check that you can manually SSH into the phyCORE-i.MX8X first to ensure that there are no underlying network issues with this. Steps for manually SSHing into the phyCORE-i.MX8X can be found in the Ethernet interface guide.