NAND
Flashing the NAND from an SD Card
The phyCORE-i.MX7 SOM can be ordered with NAND Flash populated instead of eMMC. See the Release Notes and visit the PHYTEC Support Portal for more information. The following instructions for flashing images from SD card will be useful if you want to:
Flash images because NAND is empty
Upgrade to a new release
Use custom built images
Pre-built images are available on PHYTEC’s Artifactory. If you have built your own images then the images are located in: $YOCTO_DIR/build/tmp/deploy/images/imx7s-pcm-061-0502100e/
Building U-Boot to use NAND
To build a u-boot.imx NAND image with Yocto, follow the same instructions for building the BSP described in the :ref: buildBSP-7 guide, but set the UBOOT_CONFIG variable to nand in $YOCTO_DIR/build/conf/local.conf before starting the build:
UBOOT_CONFIG = "nand"
Remember that this is a non-kit SOM and it’s yocto MACHINE configuration is included in the layer meta-phytec-extra.
Note
The phyCORE-i.MX7 SOM with NAND populated only comes with the Solo variant of the i.MX7 processor. It is important that your SD Card is flashed with the appropriate image before following the steps in this guide. See the :ref: ReleaseNotes-7 and Create a Bootable :ref: createSD-7 for more information.
Setup
You will have to expand the rootfs partition of the SD Card such that it is large enough to hold our NAND image files. This step needs to be performed only once for a given SD Card:
Take your bootable SD Card and connect it to your Ubuntu Host Machine.
In the Terminal, install gparted:
Host (Ubuntu)sudo apt-get install gparted
Run gparted:
Host (Ubuntu)sudo gparted
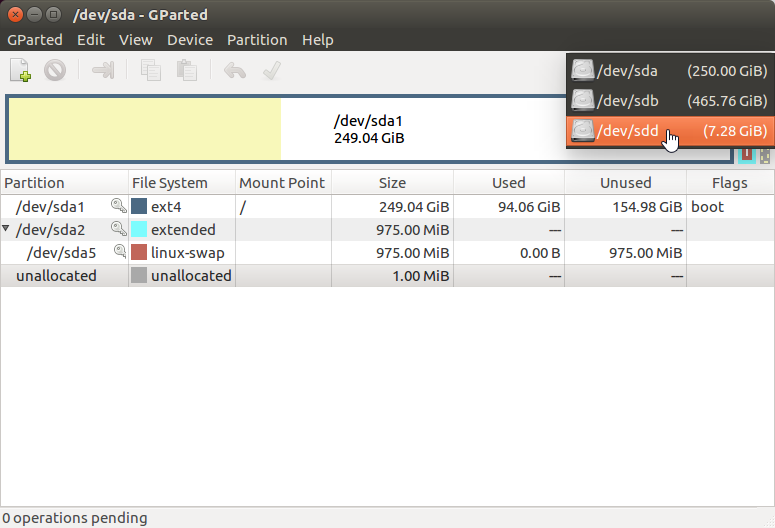
Select the bootable SD Card in the upper right drop down menu:
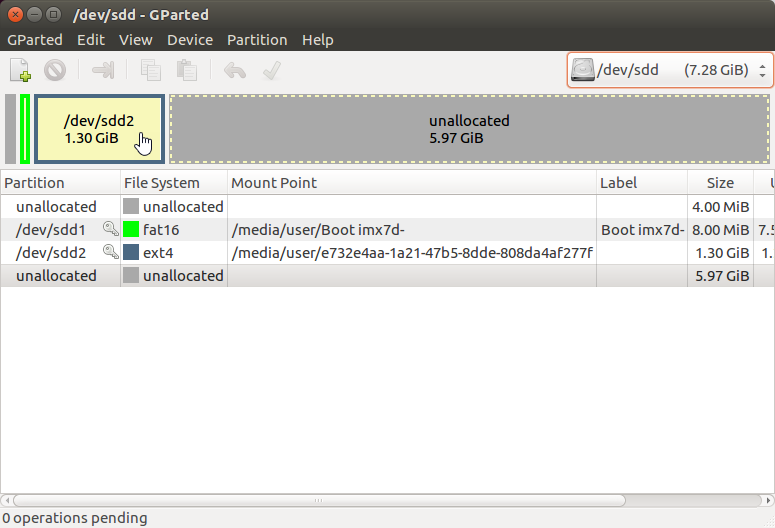
Select the rootfs partition:
Select the Resize/Move button at the top toolbar:

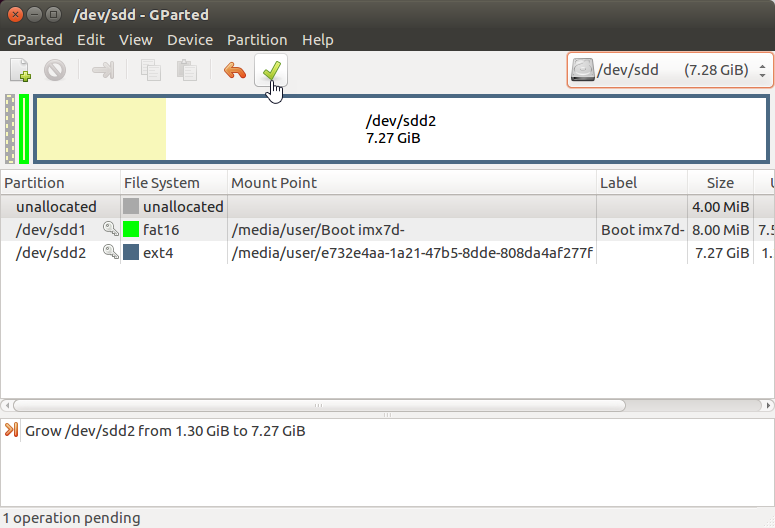
Enter the maximum size of the partition as the new size before hitting the Resize button:

Apply the operation:
Once the partition is successfully resized, close gparted. You will need this reformatted SD Card to complete the rest of this guide.
Download the following files to your Ubuntu Host Machine or locate the ones you built.
SD Card Image - (you only need this file to flash the eMMC, the rest are for demonstrating how to update specific components on your eMMC and are not necessary)
Copy the downloaded files to the SD Card:
Host (Ubuntu)sudo cp ~/Downloads/fsl-image-validation-imx-imx7d-phyboard-zeta-004.sdcard.bz2 /media/user/e732e4aa-1a21-47b5-8dde-808da4af277f/home/root #optional files sudo cp ~/Downloads/zImage /media/user/e732e4aa-1a21-47b5-8dde-808da4af277f/home/root sudo cp ~/Downloads/zImage-imx7d-phyboard-zeta-004.dtb /media/user/e732e4aa-1a21-47b5-8dde-808da4af277f/home/root sudo cp ~/Downloads/u-boot.imx /media/user/e732e4aa-1a21-47b5-8dde-808da4af277f/home/root sudo cp ~/Downloads/fsl-image-validation-imx-imx7d-phyboard-zeta-004.ext4 /media/user/e732e4aa-1a21-47b5-8dde-808da4af277f/home/root
Safely eject your SD Card and connect it to your phyCORE-i.MX7 development kit.
Configure your phyCORE-i.MX7 development kit to boot from SD Card and boot into Linux. See :ref: bootswitches-7 for more information.
Flash the NAND
Erase mtd0 and use NXP’s utility “kobs-ng” to flash the u-boot.imx-nand file to NAND:
Target (Linux)flash_erase /dev/mtd0 0 0 kobs-ng init -x ~/u-boot.imx
Flash zImage and the device tree:
Target (Linux)flash_erase /dev/mtd1 0 0 nandwrite -p /dev/mtd1 ~/zImage flash_erase /dev/mtd2 0 0 nandwrite -p /dev/mtd2 ~/zImage-imx7s-pcm-061-0502100e.dtb
Flash the file system:
Target (Linux)flash_erase /dev/mtd3 0 0 ubiformat /dev/mtd3; ubiattach /dev/ubi_ctrl -m 3; ubimkvol /dev/ubi0 -N rootfs -m mkdir /tmp/rootfs mount -t ubifs ubi0:rootfs /tmp/rootfs tar -xf ~/fsl-image-validation-imx-imx7s-pcm-061-0502100e.tar.bz2 -C /tmp/rootfs/ && sync
And you are all set! Poweroff the board, adjust the boot switches to boot from NAND then give it a shot!