Quickstart
If you have just purchased a phyFLEX-AM62Px Development Kit, this Quickstart guide will help you boot your development kit into Linux and establish a serial console session with it.
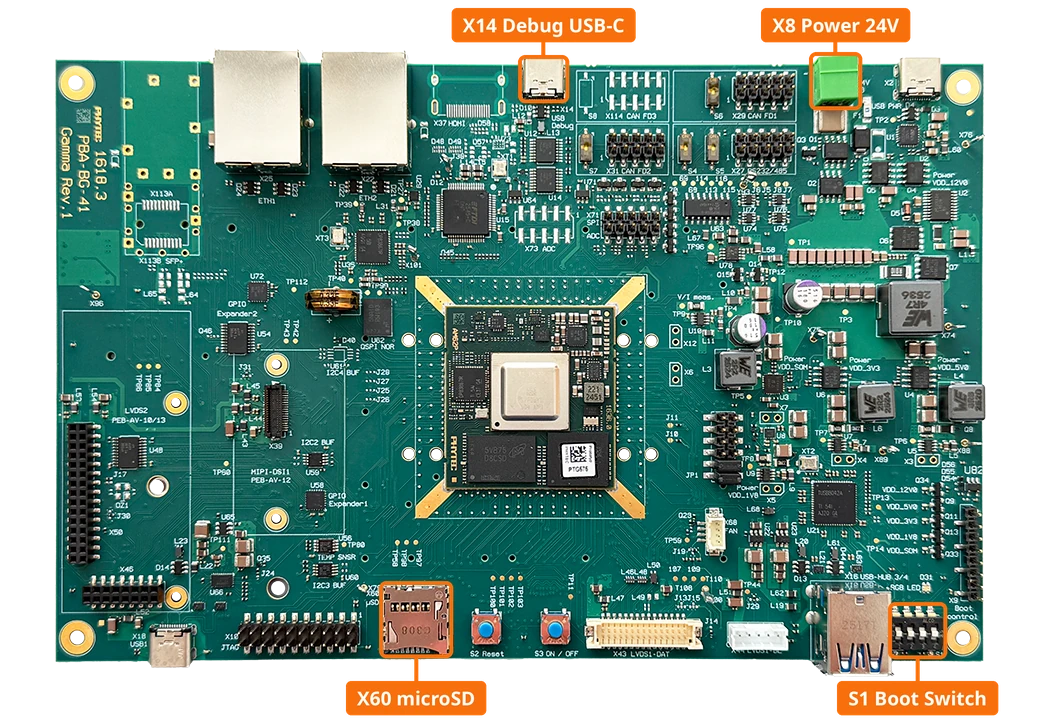
Basic Evaluation Requirements
Host system requirements are minimal for basic serial communication, and for the purposes of this Quickstart any modern computer could be used (Windows or Linux Host Machines).
Tip
This Quickstart will leverage pre-built software images in order to boot and communicate with the phyFLEX-AM62Px Development Kit. In order to re-build or introduce changes to the phyFLEX-AM62Px‘s Linux Board Support Package (BSP) a Linux Host Machine is required. A common and viable approach to satisfying this requirement is to install a Linux Virtual Machine onto a Windows computer. Further information such as the recommended Linux Distribution, RAM allocation and free disk space can be found in the Build the BSP guide.
Check the Board Configuration
The phyFLEX-AM62Px Development Kit should have been pre-configured during PHYTEC’s manufacturing process, but we will double check it together as an exercise:
Taking care to avoid Electrostatic Discharge (ESD), press firmly down on the edges of the SOM to ensure that it is fully seated onto the Development Kit carrier board’s mating connectors. If evaluating multiple SOM configurations, this will be an important step to perform when swapping between SOMs.
Ensure that an SD Card is inserted into the Development Kit’s SD Card slot. This SD Card was prepared with a pre-built software image and will boot your phyFLEX-AM62Px Development Kit into Linux.
Tip
The SD Card Booting Essentials guide explains how to re-create the bootable SD Card in the event that it is missing, corrupted or outdated.
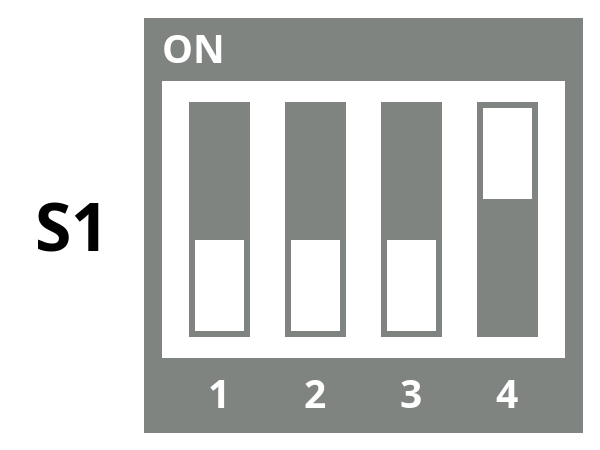
Set boot switch S1 to SD Card boot:
Serial Communication Setup
Using a USB-C cable, connect the X14 USB-C Debug Port of the phyFLEX-AM62Px Development Kit to an available USB port on your Host Machine.
Windows 11 Instructions
Once the phyFLEX-AM62Px Development Kit is connected to your Windows Host Machine, you will need to determine the COM port in which the Linux serial console will be active on.
Open your Windows Device Manager and expand the “Ports (COM & LPT)” section.
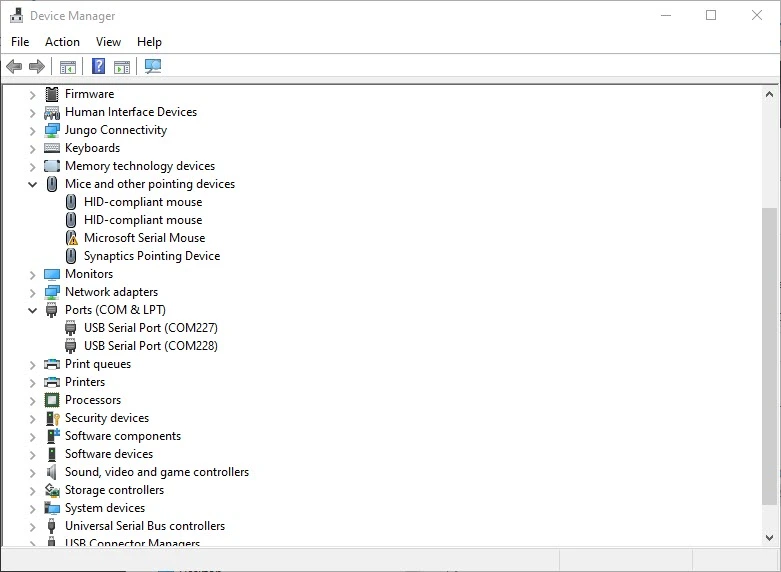
You should see four COM Ports provided by the phyFLEX-AM62Px Development Kit’s FTDI USB to UART Bridge. You will need the lower COM Port Number in the following steps in order to establish serial communication with Linux running on the target hardware.
The first COM Port is the Linux console (UART1, Cortex-A53 compute cluster). The second COM Port connects to MCU_UART0 only if jumper JP1 pins 5+6 and 9+10 are closed (not closed by default). The third and fourth COM Ports are wired to the reset and boot mode signals and are not serial consoles.
Download and open the terminal emulator of your preference. There are many options freely available, such as PuTTY and TeraTerm.
Tip
This guide will use TeraTerm. The User Interface of your terminal emulator will look slightly different depending on which you decide to use, but serial port settings will generally look the same in all terminal emulators.
Create a New Connection using your preferred terminal emulator:
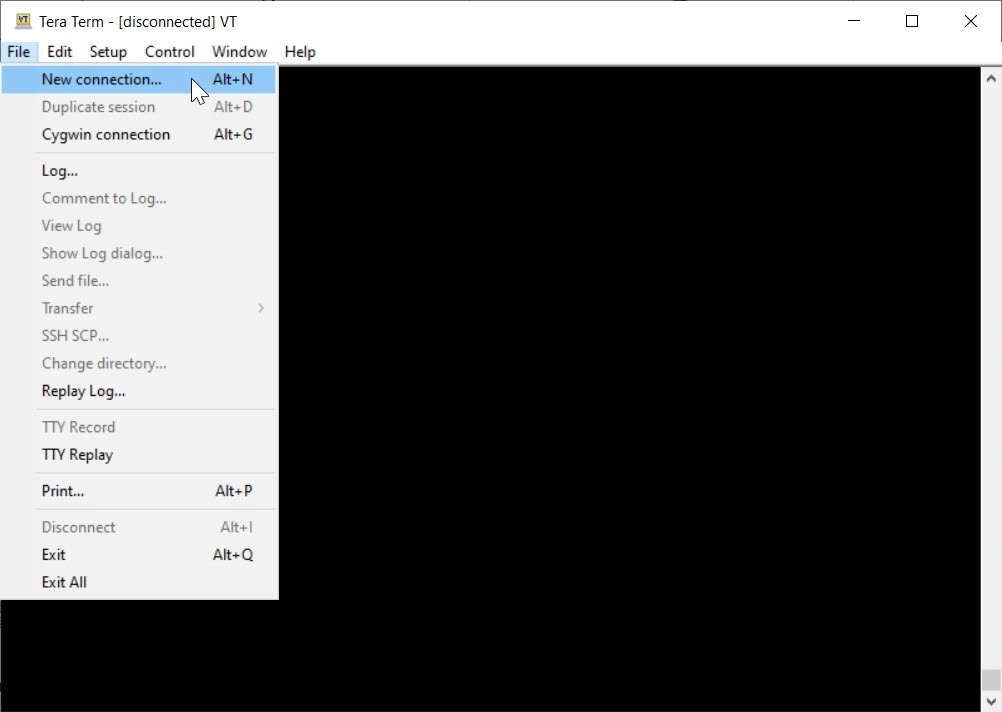
When prompted to configure the connection, specify the connection type as “Serial” and select the COM Port number found in the previous steps.
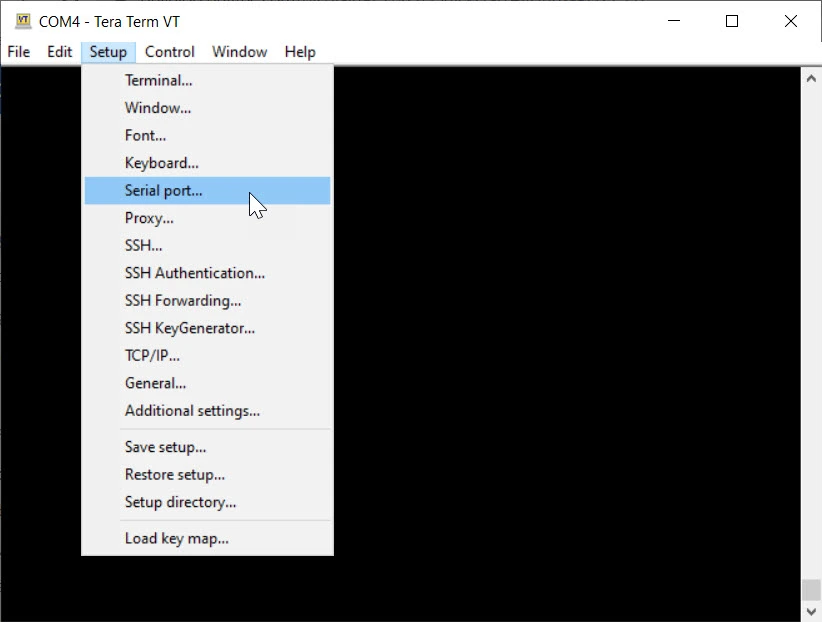
Further setup of your serial connection is usually necessary in TeraTerm. Access the “Serial Port” settings in the “Setup” tab.
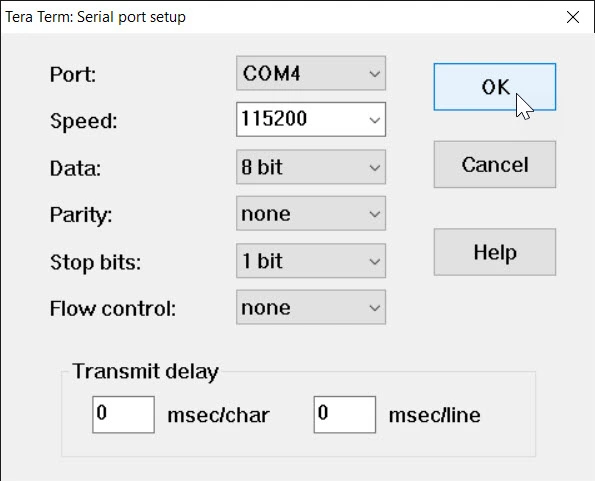
Configure the connection for 115200 Baud, 8 bit data, no parity bits, 1 stop bit and no flow control.
Once you have an empty terminal session, your host system is effectively listening for console data over the COM port you selected. The documentation for the phyFLEX-AM62Px (outlined throughout this wiki) will generally refer to this serial session as the “Target (Linux)” console, as opposed to your Linux Host’s console.
Linux Instructions
Once the phyFLEX-AM62Px Development Kit is connected to your Linux host machine, its FTDI USB-to-UART bridge will appear as four devices; /dev/ttyUSB0, /dev/ttyUSB1, /dev/ttyUSB2 and /dev/ttyUSB3.
Open the serial connection with
minicom(which you may need to install first).
sh-host:~$ sudo apt-get update && sudo apt-get install minicom
sh-host:~$ minicom -D /dev/ttyUSB0 -b 115200
Alternative command ‘screen’ may also be used.
sh-host:~$ sudo apt-get install screen
sh-host:~$ screen /dev/ttyUSB0 115200
Note
If you have more than 1x USB serial device connected (this could be a second Development Kit, for example), you will have to determine which /dev/tty* device is specific to your target hardware (otherwise, you may connect to the wrong serial device). Some techniques for determining this include:
Use
dmesgto see which device connected most recently (dmesgwill output all kernel messages andtailjust limits this to the last 10 lines).sh-host:~$ sudo dmesg | tail
Scan the output for your serial device and you will see the specific device enumerator (/dev/tty*) that the kernel assigned to the device.
Alternatively, use the following command to output all serial devices detected by the kernel at once:
sh-host:~$ ls -l /dev/serial/by-id
The output will show which /dev/tty* device enumerator got assigned to each serial device and this has the added benefit of displaying some driver information associated with each device’s serial port. This can be helpful in determining which /dev/tty* file corresponds to which physical piece of hardware.
Power the Board
Using the included 24V power supply, provide power to the phyFLEX-AM62Px Development Kit’s X8 Power Connector. The system will automatically boot once power is supplied and you should begin to see activity on the serial console. At the conclusion of the boot log, you should be presented with a Linux login prompt.
Expected Output
 ____   _   _ __   __ _____  _____   ____
|  _ \ | | | |\ \ / /|_   _|| ____| / ___|
| |_) || |_| | \ V /   | |  |  _|  | |
|  __/ |  _  |  | |    | |  | |___ | |___
|_|    |_| |_|  |_|    |_|  |_____| \____|

    _     __  __  ____   _      ___  ____   _   _ __   __
   / \   |  \/  ||  _ \ | |    |_ _||  _ \ | | | |\ \ / /
  / _ \  | |\/| || |_) || |     | | | |_) || |_| | \ V /
 / ___ \ | |  | ||  __/ | |___  | | |  __/ |  _  |  | |
/_/   \_\|_|  |_||_|    |_____||___||_|    |_| |_|  |_|

ampliPHY Vendor (Phytec Vendor Distribution) BSP-Yocto-Ampliphy-AM62Px-PD26.2.0 am62pxx-phyflex-libra-rdk-1 ttyS2

am62pxx-phyflex-libra-rdk-1 login:
Login using “root” (no password is required).
Tip
You may find that commands and text in the terminal wrap over themselves if they extend too far on a single line in your terminal window. To improve usability and to prevent text from wrapping over itself use the following command once you have your window sized to your liking:
am62pxx-phyflex-libra-rdk-1:~# shopt -s checkwinsize && resize
Safe Shutdown
Before removing power from the Development Kit, it is recommend to initiate a safe shutdown whenever possible. This will help to avoid issues such as filesystem corruption, which can prevent the hardware from booting up properly the next time it is needed.
To initiate a shutdown run the following command:
am62pxx-phyflex-libra-rdk-1:~# poweroff
Once you see the “reboot: Power down” message it is safe to remove the power supply from the Development Kit.
[  115.208115] systemd-shutdown[1]: Powering off.
[  115.278661] reboot: Power down
Note
For technical support, please visit PHYTEC’s Support Portal!