Modify The BSP
There can be a significant learning curve to working with The Yocto Project and this guide will serve as a resource for developers to quickly test changes to the BSP. After working through this guide, you should be able to comfortably navigate the BSP and manually introduce custom modifications on-top of it in order to evaluate the interfaces and functionality required by your custom application.
Note
In order to follow this guide, you must have first built the BSP in its entirety and have your BSP environment initialized. Checkout the Build the BSP guide if you haven’t yet!
The built BSP has two primary directories at its root and these are the /sources and /build directories. These two directories are significant and here is a summary of why (the paths here may be slightly different for you if you deviated from the instructions):
~/BSP-Yocto-Ampliphy-AM62x-PD25.1.1/yocto/sources - This directory contains meta-layers. Meta-layers are repositories that contain instructions for fetching, building and deploying certain software packages (those instructions are referred to as recipes). Layers can also contain instructions for changing recipes and settings introduced by other layers. This powerful override capability is what allows you to customize the supplied meta-phytec or community layers to suit your product requirements. The instructions included in meta-layers are typically referred to as recipes.
~/BSP-Yocto-Ampliphy-AM62x-PD25.1.1/yocto/build - This directory is used by the build system during the build process and is generally referred to as $BUILDDIR in the documentation (which is a handy environment variable that gets exported automatically when you source the build environment). Packages called for by the build target, as defined by their recipes are fetched, unpacked, compiled and staged for deployment here.
Note
It is important to distinguish between modifying the local sources of a particular package and modifying the recipe for a given package!
If you are new to working with The Yocto Project, then the Yocto Project Overview and Concepts Manual will be a good document to read through to get a high level understanding of what is going on. The Yocto Project Reference Manual is the best resource for in-depth documentation regarding directory structure, recipes, tasks, and other aspects of actually working with the BSP’s build system.
Adding Packages to the BSP
The best way to see what packages are available on the target image is to check the image manifest, which is a file that is deployed along with the phytec-qt6demo-image build target. Use the following to open this file:
sh-container:~$ vim $BUILDDIR/deploy-ampliphy/images/phyboard-lyra-am62xx-3/phytec-qt6demo-image-phyboard-lyra-am62xx-3.rootfs.manifest
If there is a package that you need that wasn’t included in the target image by default, then you should first check if the package was included in the build tree.
sh-container:~$ cd $BUILDDIR

#lists all available packages
sh-container:~$ bitbake -s

#search for specific packages by name
sh-container:~$ bitbake -s | grep <package name>
If the package you need is listed then you can add the package to the image by simply adding the following line to the end of your build’s conf/local.conf file:
conf/local.conf
IMAGE_INSTALL:append = " <package name1> <package name2>"
Adding these packages to the target image by way of the conf/local.conf file is some-what of a temporary way to introduce packages, and you will eventually add these in a more permanent way in your custom meta layer using a machine or distro configuration file (depending on which is more appropriate).
Note
The IMAGE_INSTALL variable can hold a space separated list of packages you wish to add to the default BSP. Note that the leading space in the list is necessary when appending to it!
If the package you need is not listed, then this means that PHYTEC did not include the support for the recipe in the build tree by default. If this is the case, you may need to find a community layer which introduces the recipe/package you need or create your own. Community layers can be searched on the Open Embedded Layer Index, just make sure you are searching the correct Yocto version for your BSP, BSP-Yocto-Ampliphy-AM62x-PD25.1.1 uses Yocto 5.0.16 Scarthgap.
Note
Adding meta-layers to the BSP that aren’t included in the build tree by default is discussed in the Create a Custom Meta-Layer guide.
Modify the Kernel Config
The BSP’s build system also includes kernel development tasks for interacting with the Linux kernel’s own menuconfig tool, which is a graphical tool for configuring the driver support included in the kernel.
Launch the menuconfig tool with the following command:
sh-container:~$ bitbake linux-phytec-ti -c menuconfig
Once menuconfig launches, you can navigate the available configuration options using the arrow keys on your keyboard to enable or disable support as required.
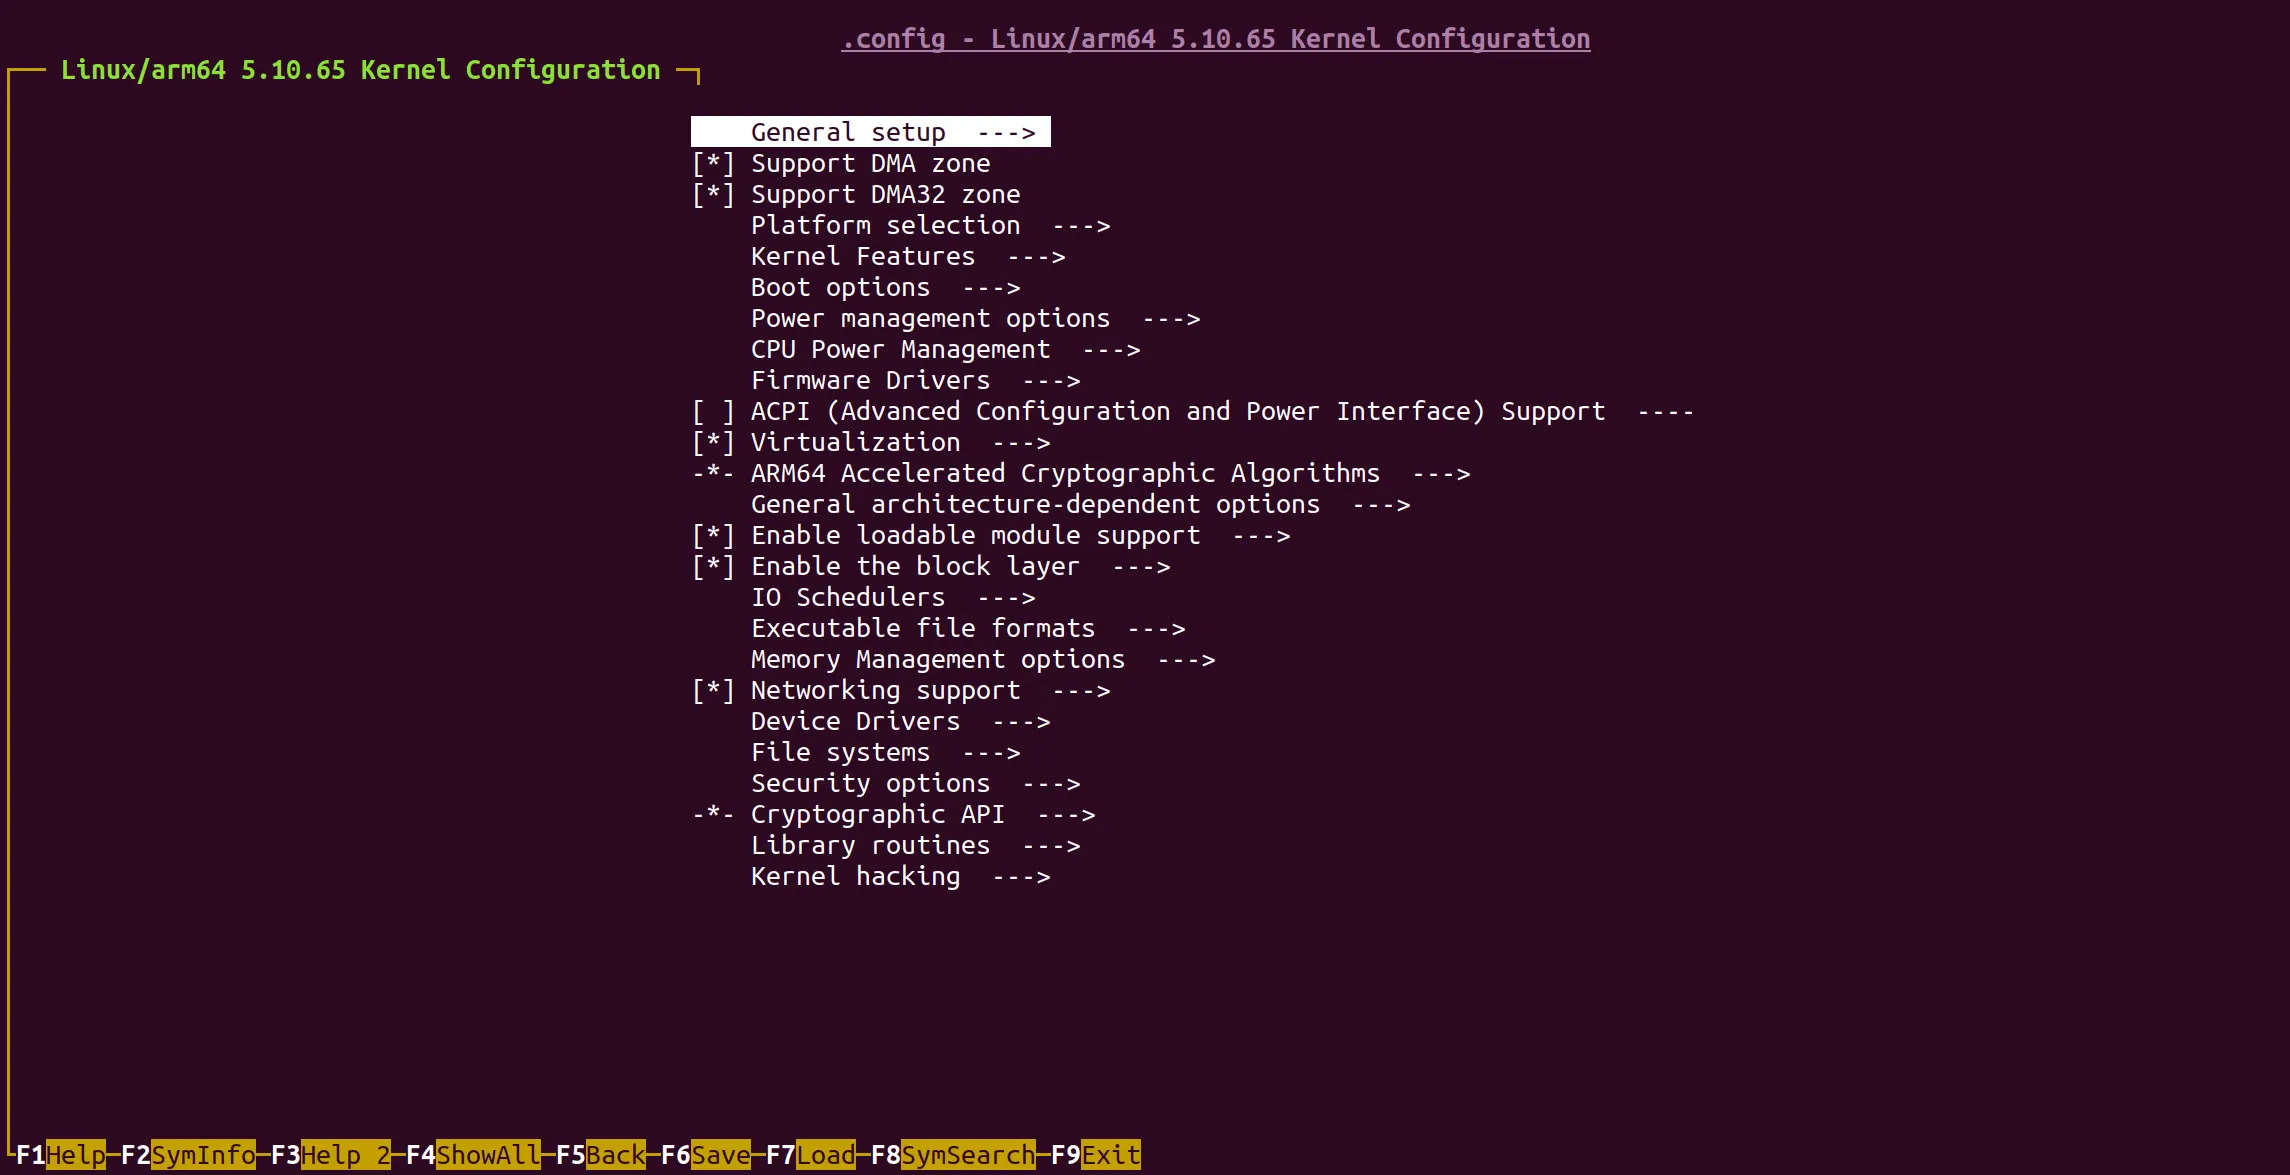
Remember to save any changes to the kernel configuration to a .config file before exiting menuconfig.
Once you have saved your changes using the menuconfig utility, you can use bitbake to re-compile just the kernel to make those changes take effect:
sh-container:~$ bitbake phytec-qt6demo-image
This change is temporary and will be removed the next time linux-phytec-ti is cleaned. For a permanent solution, clone the Linux repository.
sh-container:~$ cd ~/BSP-Yocto-Ampliphy-AM62x-PD25.1.1
sh-container:~$ git clone -b v6.12.57-11.02.11-phy6 https://github.com/phytec/linux-phytec-ti
sh-container:~$ cd linux-phytec-ti
sh-container:~$ git checkout -b v6.12.57-11.02.11-phy6
sh-container:~$ cd $BUILDDIR
Next, append the following lines to the end of your conf/local.conf file. This configures Yocto to use the locally checked-out repository.
SRCREV:pn-linux-phytec-ti = "${AUTOREV}"
GIT_URL:pn-linux-phytec-ti = "git:///home/<USER>/BSP-Yocto-Ampliphy-AM62x-PD25.1.1/linux-phytec-ti/;protocol=file;"
BRANCH:pn-linux-phytec-ti = "v6.12.57-11.02.11-phy6"
Note
Replace <USER> with your Linux username. If you’re unsure of your username, use the following command to check:
sh-container:~$ echo \$USER
Refer to the Standalone Kernel Development guide for instructions on using menuconfig in a standalone kernel repository. Remember to commit all your changes to the local repository; otherwise, Yocto will not include them in the next build.
Modify the Kernel Sources
The BSP’s build system also provides a task to interact directly with the Linux source code without leaving the Yocto environment.
To launch the devshell tool, use the following command:
sh-container:~$ bitbake linux-phytec-ti -c devshell
Once devshell starts, you’ll have access to a Linux shell within the kernel sources. Be sure to commit any changes, as Yocto will not include them in the next build if they are not committed.
Keep in mind that since devshell uses kernel sources inside tmp-ampliphy/, all changes are temporary and will be removed the next time linux-phytec-ti is cleaned. For a permanent solution, clone the Linux repository if you haven’t already:
sh-container:~$ cd ~/BSP-Yocto-Ampliphy-AM62x-PD25.1.1
sh-container:~$ git clone -b v6.12.57-11.02.11-phy6 https://github.com/phytec/linux-phytec-ti
sh-container:~$ cd linux-phytec-ti
sh-container:~$ git checkout -b v6.12.57-11.02.11-phy6
sh-container:~$ cd $BUILDDIR
Next, append the following lines to build/local.conf if you haven’t done so already:
SRCREV:pn-linux-phytec-ti = "${AUTOREV}"
GIT_URL:pn-linux-phytec-ti = "git:///home/<USER>/BSP-Yocto-Ampliphy-AM62x-PD25.1.1/linux-phytec-ti/;protocol=file;"
BRANCH:pn-linux-phytec-ti = "v6.12.57-11.02.11-phy6"
This ensures that all changes made inside the devshell are committed to the locally checked-out repository and will persist even after a clean.
Example: Modifying the BSP Kernel Source
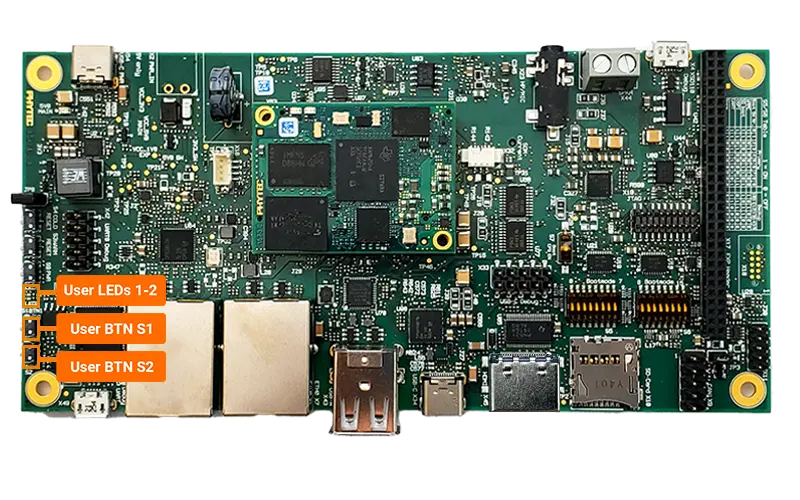
Let’s try making a small change to the kernel’s device tree and enable a heartbeat LED using the User LED1 (D24) to let us know that the system is alive automatically upon boot (this User LED1 is automatically on by default, checkout the GPIO guide to learn more about controlling it as-is):
Access the source code by either navigating to the locally checked-out kernel repository or using devshell. Use your favorite text editor to open the main device tree file for the phyCORE-AM62x development kit:
sh-container:~$ vi arch/arm64/boot/dts/ti//k3-am625-phyboard-lyra-rdk.dts
Edit the file according to the following diff:
Device Tree Diff
...
            leds {
                compatible = "gpio-leds";
                pinctrl-names = "default";
                pinctrl-0 = <&leds_pins_default>, <&user_leds_pins_default>;

                led-1 {
                        gpios = <&main_gpio0 32 GPIO_ACTIVE_HIGH>;
-                       linux,default-trigger = "mmc0";
+                       linux,default-trigger = "heartbeat";
                };

                led-2 {
...