SATA
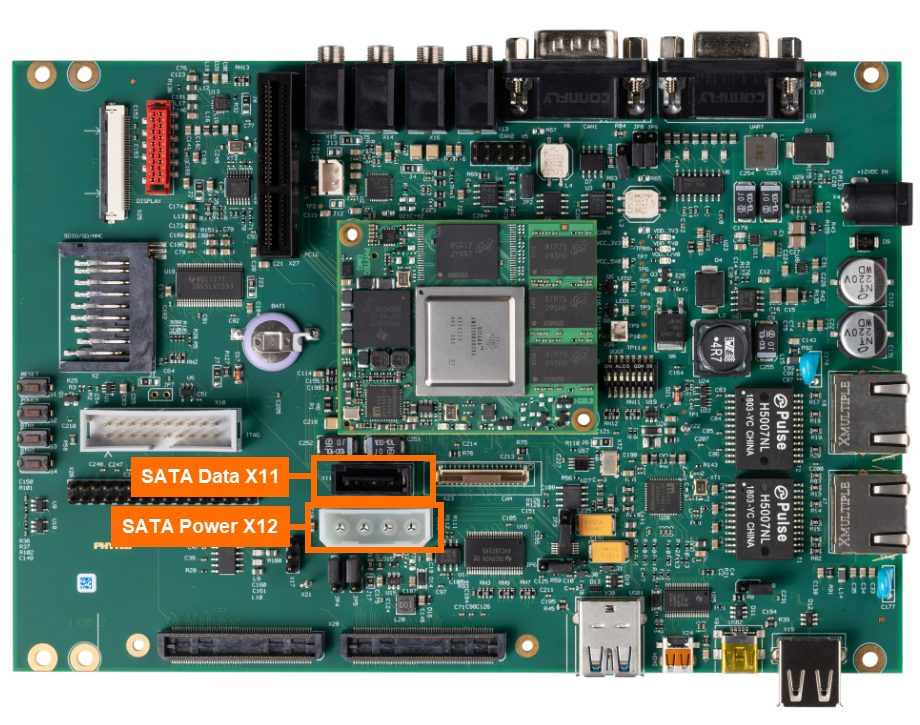
The phyCORE-AM57x development kit provides one SATA interface to the Molex data connector at X11 and the power connector at X12. Note that the SATA has a max data rate of 3Gbps. This guide will walk through the basic usage of this interface. For more information on the SATA interface on the phyCORE-AM57x, please see section 8.4 in the Hardware Manual.

Requirements
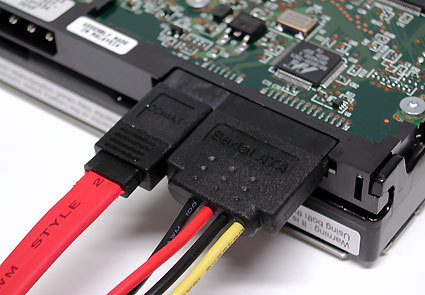
A SATA 22pin Serial ATA Data and Power Combo Cable
Hard Drive with SATA Connection
Hardware Setup
Power off and remove power from the phyCORE-AM57x development kit.
Connect the SATA Mass Storage device to the connectors X11 and X12.

Reconnect the power supply and boot into Linux.
Check that the SATA storage device was configured correctly:
Target (Linux)dmesg | grep -i "scsi"
Expected Outputroot@phycore-am57xx-1:~# dmesg | grep -i "scsi" [ 3.571014] SCSI subsystem initialized [ 6.035046] scsi host0: ahci [ 6.663644] scsi 0:0:0:0: Direct-Access ATA ADATA SX900 1 PQ: 0 ANSI: 5 [ 6.729211] sd 0:0:0:0: [sda] Attached SCSI disk
Note
Notice in the above example output that the SATA drive was automatically mounted to the device sda. Take note of the device your drive was assigned to, as you will need to specify this correctly in the following steps by replacing <x> (in the example above, as the SATA drive was attached to the device sda, we would replace <x> in the following command with ‘a’).
Testing SATA
Create a random file and copy it to the SATA drive.
Target (Linux)dd if=/dev/urandom of=/root/test.dat bs=1M count=2 cp /root/test.dat /dev/sd<x>1/test_w.dat
Copy the file back from the SATA drive to the root filesystem on the SD card.
Target (Linux)cp /dev/sd<x>1/test_w.dat /root/test_r.dat
Verify that the files were not corrupted. The following command will generate 3 hashes that uniquely identify each file. The hashes should be identical.
Target (Linux)md5sum /root/test.dat && md5sum /dev/sd<x>1/test_w.dat && md5sum /root/test_r.dat
Now remove the files that were generated:
Target (Linux)rm /root/test.dat && rm /dev/sd<x>1/test_w.dat && rm /root/test_r.dat