OSPI
An Octal Serial Peripheral Interface (OSPI) Flash is populated on the SOM as a programmable nonvolatile storage and can also be leveraged as boot media. This guide will walk through how to flash the SOM’s OSPI via U-boot, followed by booting from OSPI. For more information on OSPI, please see the phyCORE-AM64x Hardware Manual.
Flashing the OSPI Flash is detailed in its dedicated chapter, referenced as Flashing the SPI NOR Flash.
Boot from OSPI
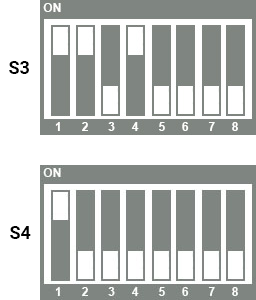
The phyCORE-AM64x development kit is configured to boot from an SD Card slot by default. This guide will serve to provide basic steps for booting from the SOM’s onboard OSPI flash memory after it has been flashed.
Keep the bootable SD card inserted in the kit if you want to boot all the way into Linux.
Due to the OSPI NOR Flash’s limited size, the steps above only flash the bootloader. The SD card still contains the kernel and root filesystem for the BSP image.
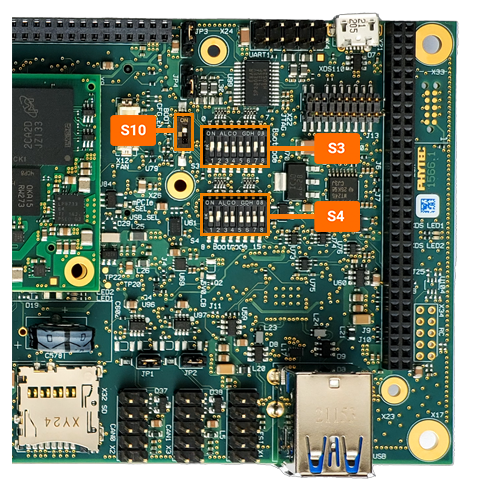
S10 should be ON
Note
Be mindful of the switch orientation!
Once you boot into linux, in order to populate the
/devdirectory, you must run the following command. Once/devis populated, you can write to the eMMC.phyboard-electra-am64xx-2:~# mount -t devtmpfs udev /dev